Compact Science is an engaging new YouTube series from WNED PBS and the Buffalo Museum of Science that explores the wonders of science right in our own backyard. Host Sarajane Gomlak-Green investigates the geology of Niagara Falls, discovers the chemistry at work in sponge candy, learns how density plays a key role in lake-effect snow, and more.
If you’re curious about the world around you, there’s a lot to explore and Compact Science will be your guide.
Geared towards children (grade K-6), their families, and anyone with a curiosity of the world around them, Compact Science episodes frame a scientific concept with a signature regional connection that celebrates the science and history of the Western New York and Southern Ontario region. Journey to Niagara Falls to explore geology, discover the chemistry at work in sponge candy, learn how density is the key to lake-effect snow, investigate the role of friction through the sport of curling, and more.
Each episode concludes with a Compact Science Viewer Challenge, an experiment aligned with National Science Education Standards, that can be performed at home or in a classroom. Instructions will be available right here on our website. We invite you to share your videos and photos of your results and we'll add them to the website.
Compact Science is funded in part by The Joy Family Foundation and the New York State Education Department.
Meet Sarajane
Sarajane is a lifelong Buffalo resident and is currently the Director of Museum Programs and Experiences at the Buffalo Museum of Science. She has a passion for understanding the world we all live in - and one way is through science! Equipped with a life-long enthusiasm for all things STEM, she digests and explains concepts in ways that everyone can understand. When not at the Museum, she is an aspiring polyglot, sporadically avid reader, and a mediocre Tetris player.
Why Does Buffalo Smell Like Cheerios? The Maillard Reaction Explained! | Watch
Why does Buffalo, NY smell like breakfast? In this episode of Compact Science Sarajane explores the kitchen chemistry behind this phenomenon. Discover how molecules create smells, and dive into the Maillard reaction, the process that gives us deliciously browned foods. From cereal to cookies, learn why these scents make our mouths water! Take a sensory journey through the science of scent!
In this episode Sarajane explores the science behind the sweet smells that waft over Buffalo from the General Mills plant. We learn about the vital role the Maillard reaction plays in the smell, taste and appearance of food. The Maillard Reaction happens every time you heat a mixture of sugars and amino acids, both of which are in Cheerios.
My City Smells Like Cheerios | Biology
Topic: Senses, Diffusion, Motion of Molecules, Nanotechnology, Cell Membranes, Permeability
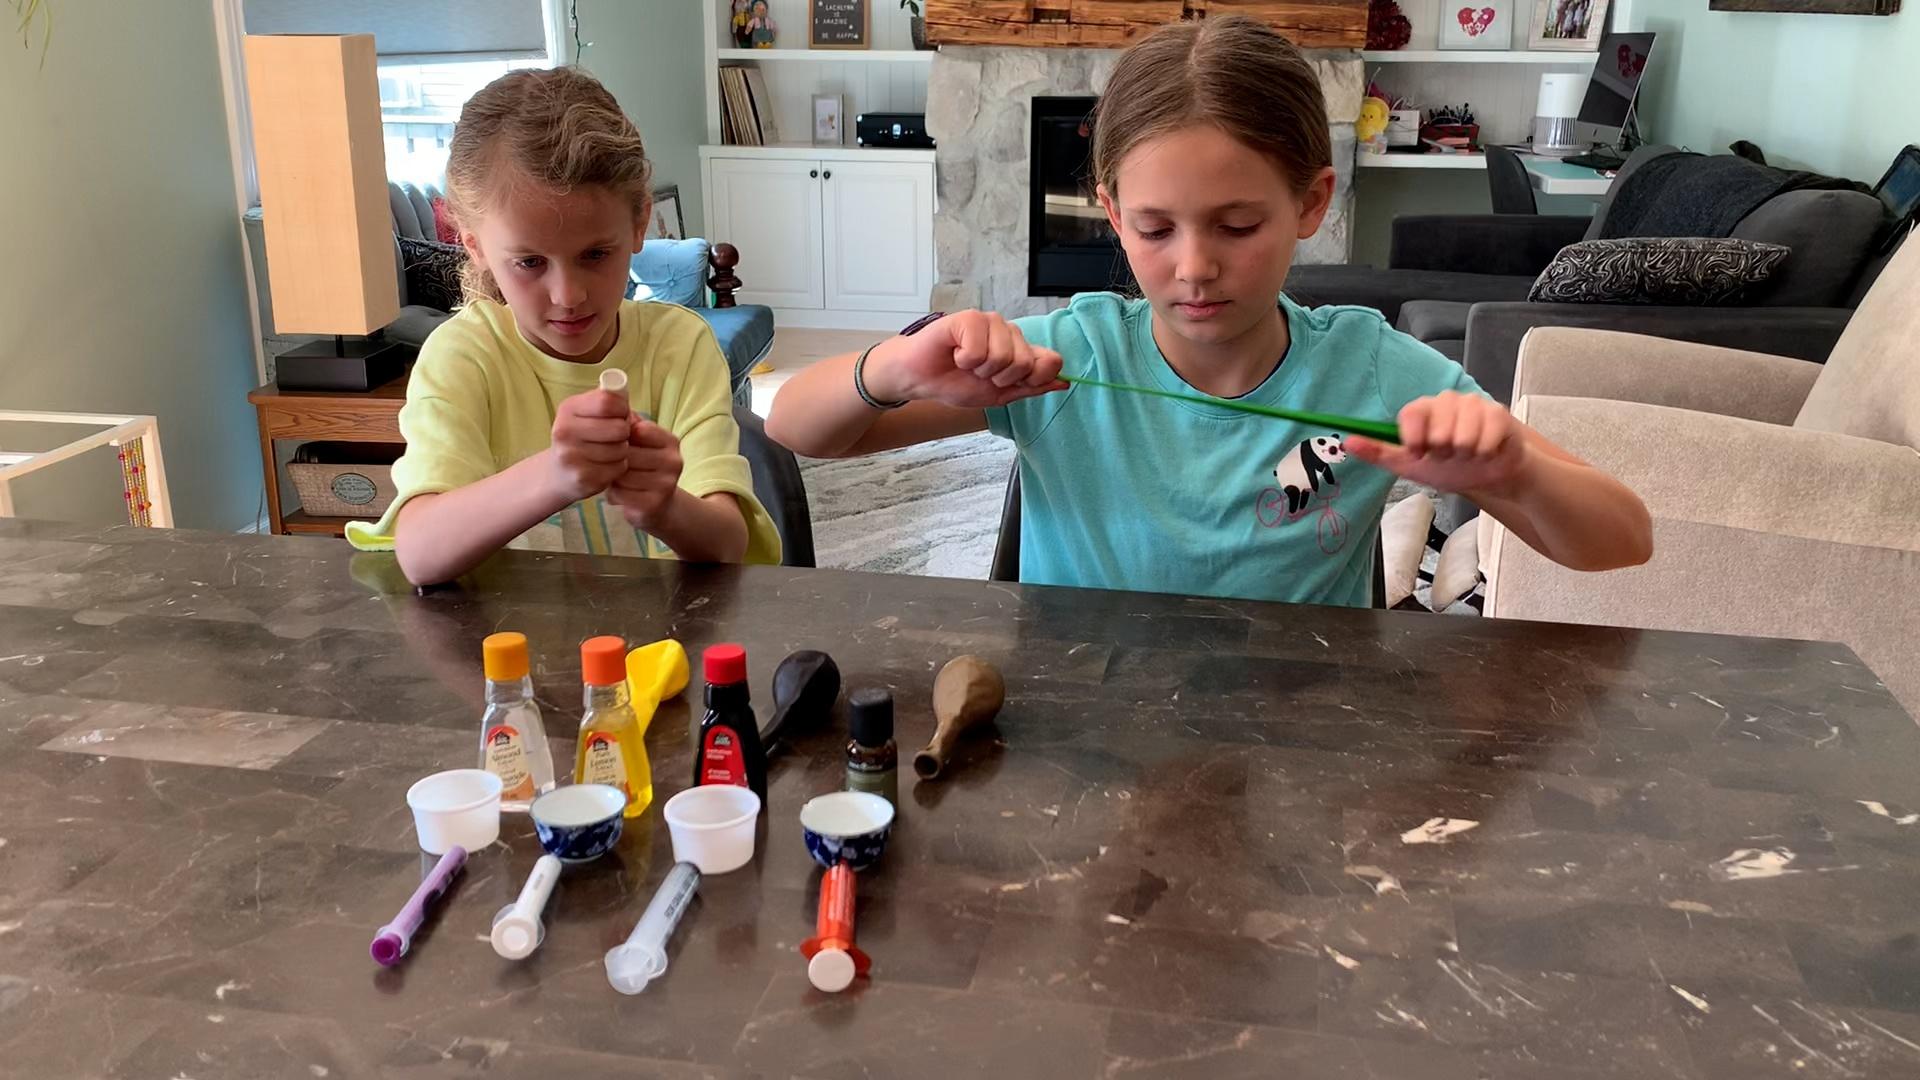
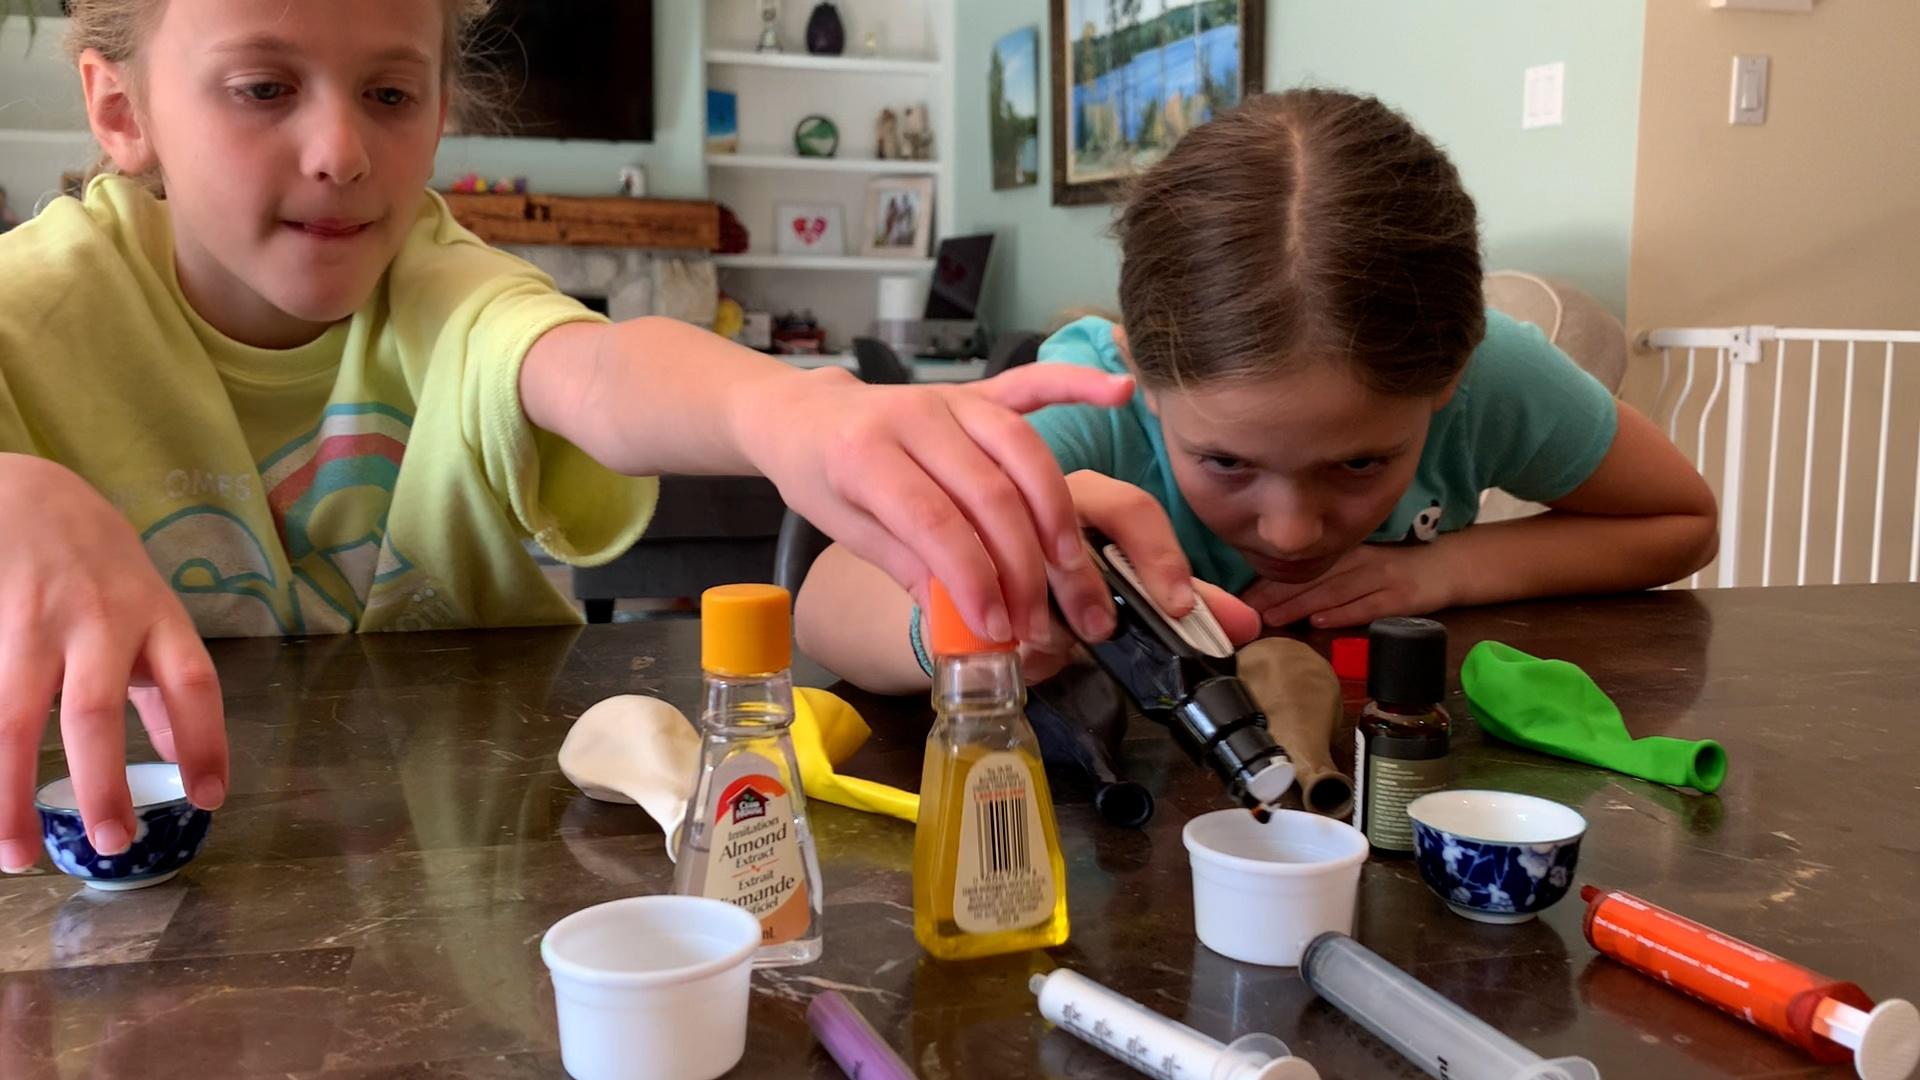
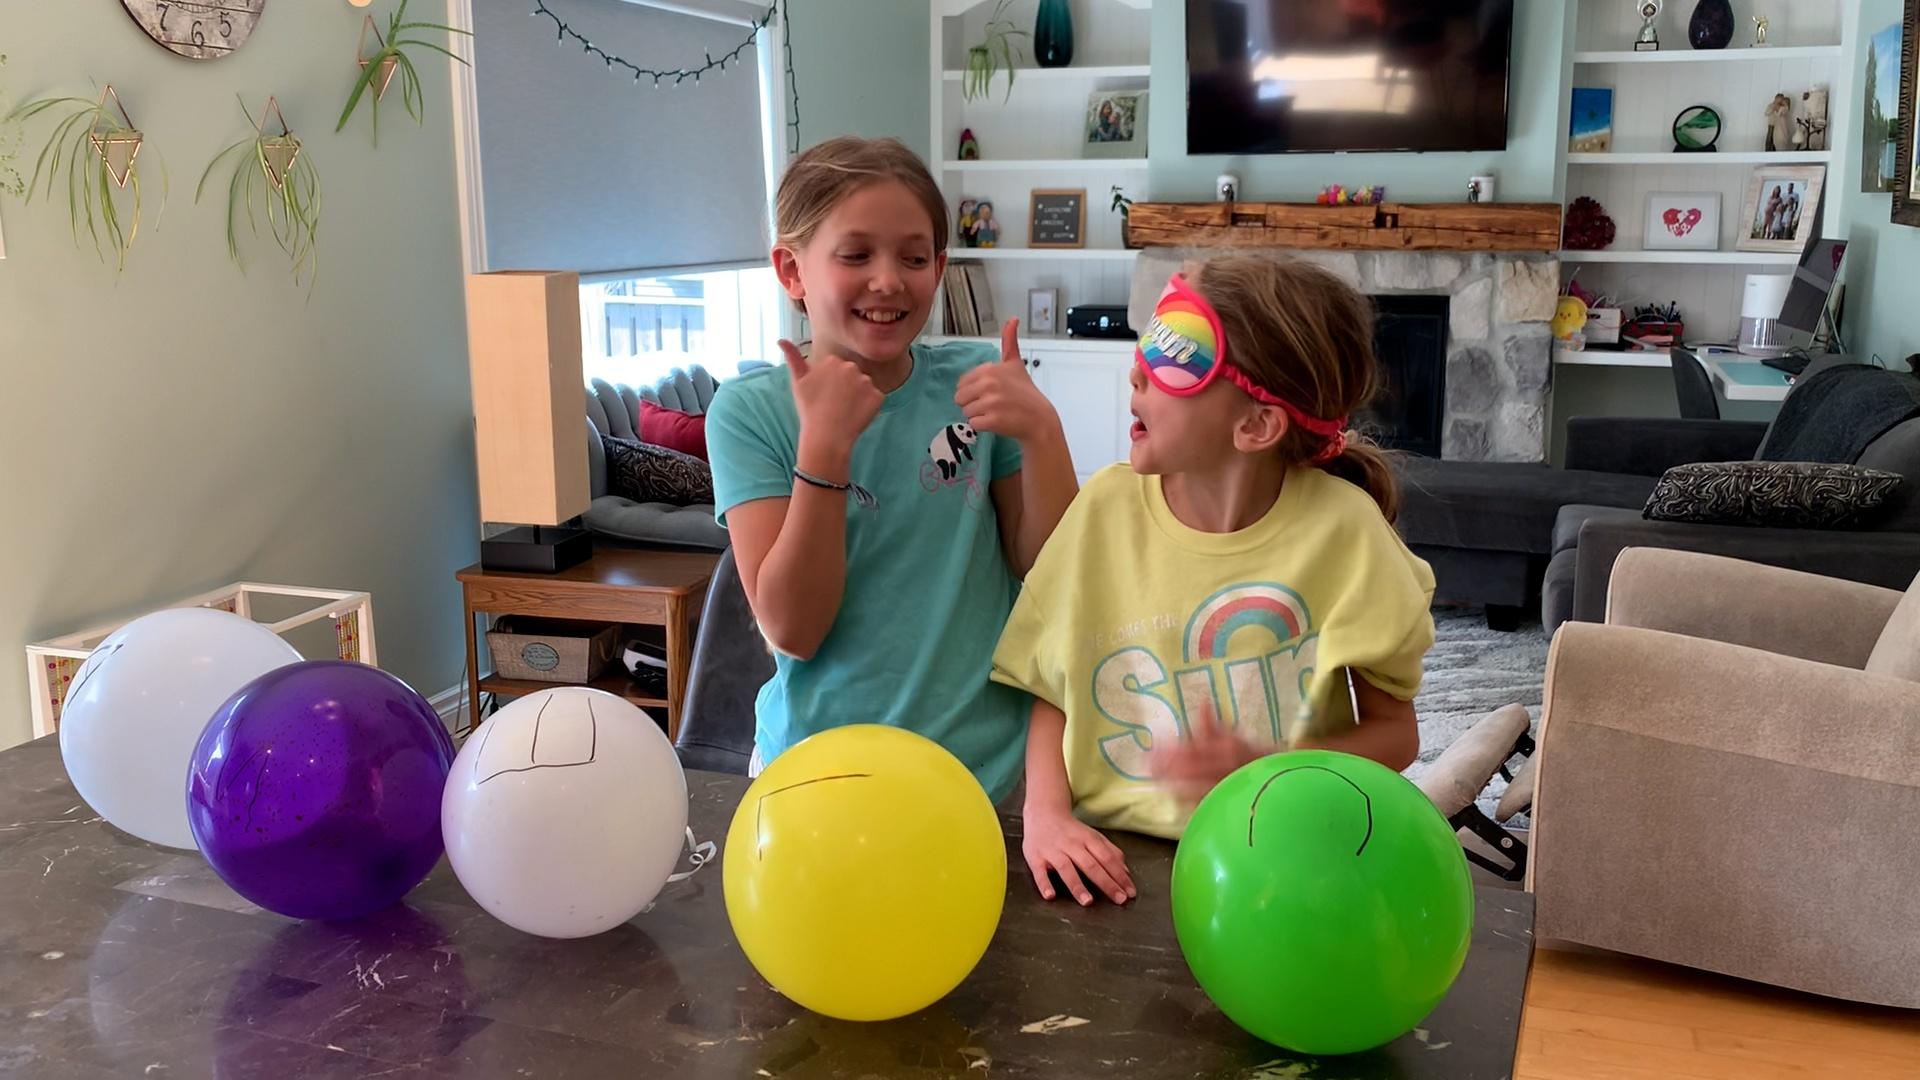
Viewer Challenge/At-Home Version: Smelly Balloons
It may be true that seeing is believing, but molecules are hard to see. Sometimes, however, we can smell them. Use your sense of smell to explore the world on the nanoscale.
Materials:
- Large round latex balloons (an assortment of colors is ideal)
- Variety of flavored extracts (vanilla, orange, mint etc.) * or different odor substances
- Eyedropper or plastic pipettes
- Paper and pen, pencil, marker or crayon.
- String and tape (optional)
* Flavor extracts can be pricey, so if you don’t have very many at home you have some other options. You can use essential oils mixed with some water, perfume, or cooking spices.
Directions:
- Collect different extracts you plan to use.
- Select balloons. If you plan to use 4 extracts, you will need 5 balloons (one extract per balloon, plus an empty balloon as a control).
- Select one person to prepare balloons and add the scents.
- Stretch each balloon several times with your hands before inflating. Inflate each balloon completely and then let the air out. This will also help to stretch out each balloon.
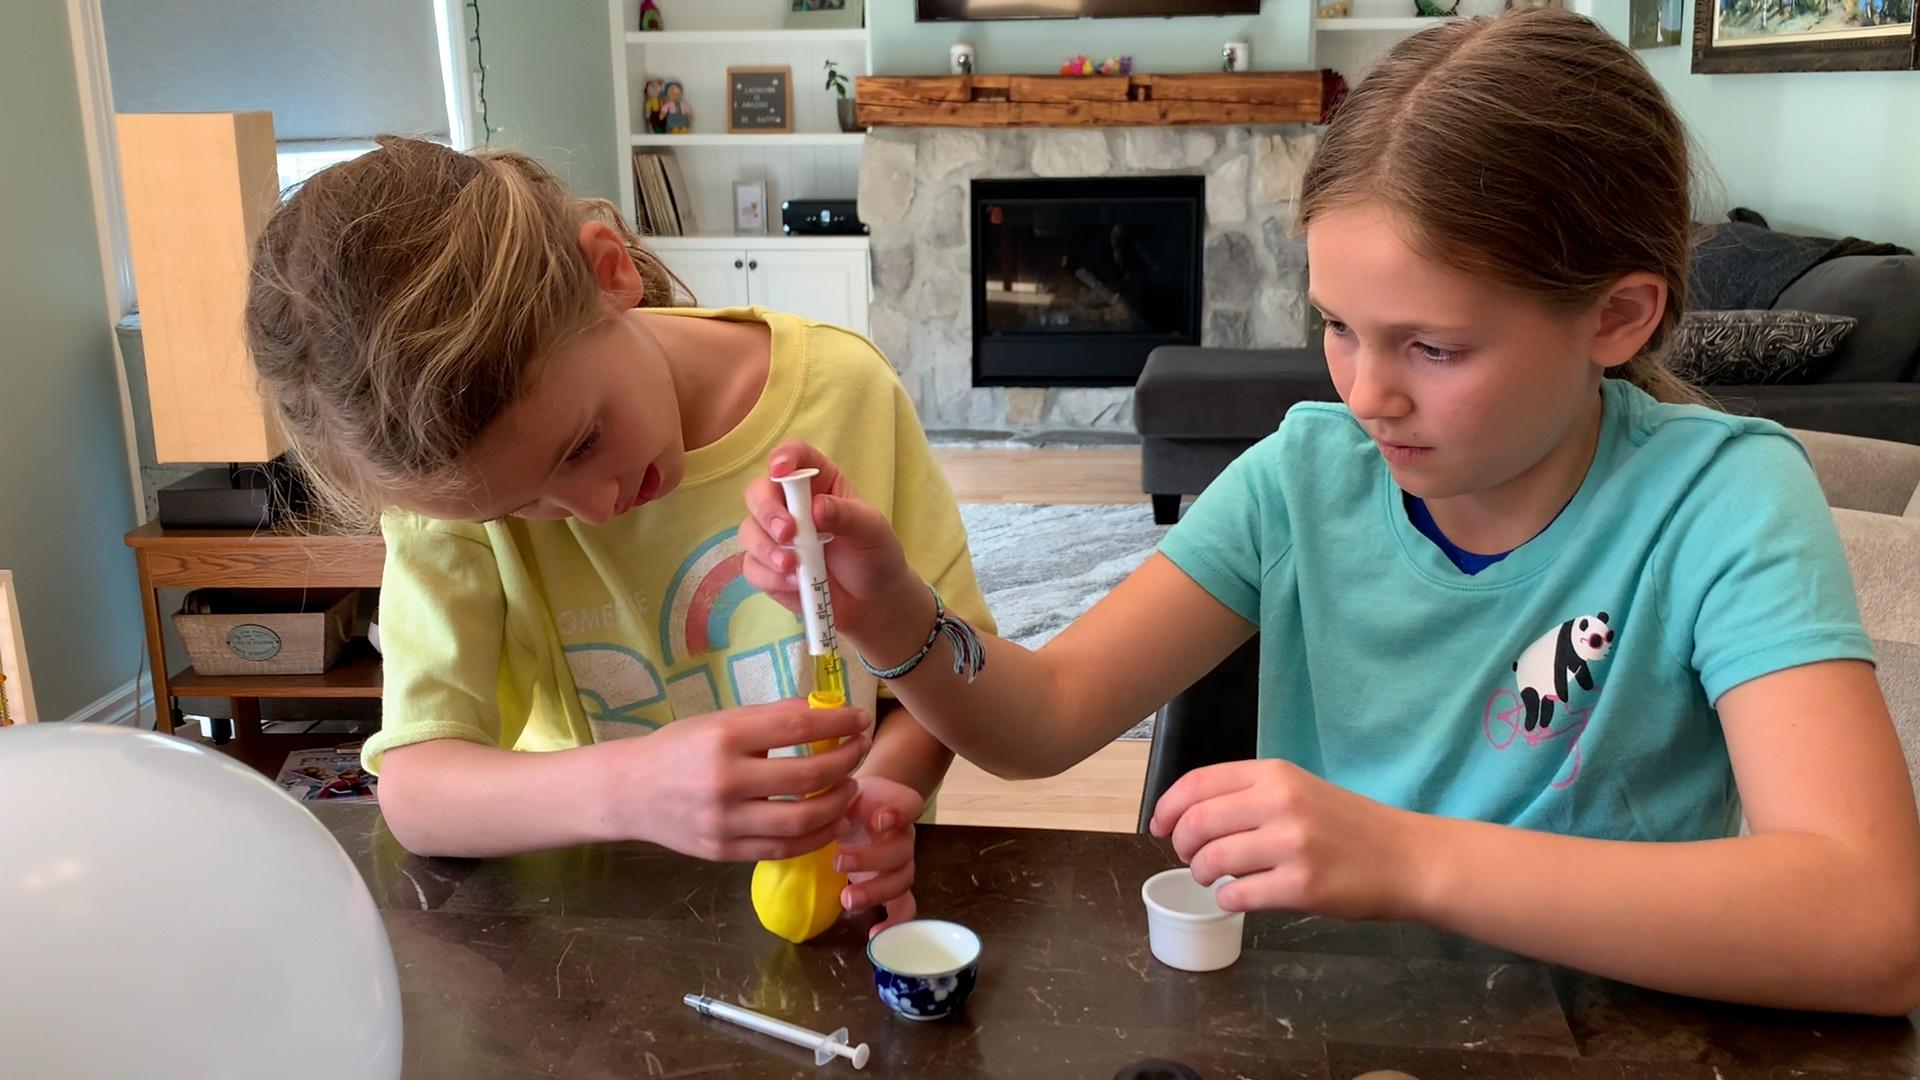
- Using a clean eyedropper pipette, place about 2 mL of the first extract into the balloon. Make sure the tip is well inside the balloon before squeezing to add the extract.
- Rub the liquid around so the inside of the balloon is coated, and then blow up the balloon and tie it shut.
- Using a new/clean eyedropper or pipette, place 2 mL of the next extract into a different colored balloon. Repeat this step until you have as many scents as desired.
- Blow up one colored balloon with no scent inside. Since latex balloons have their own odor, this will be used as a control.
- Record which extract is placed in each balloon.
- Optional: Tie a string to the end of the balloons and tape the strings to the table to help keep them in place.
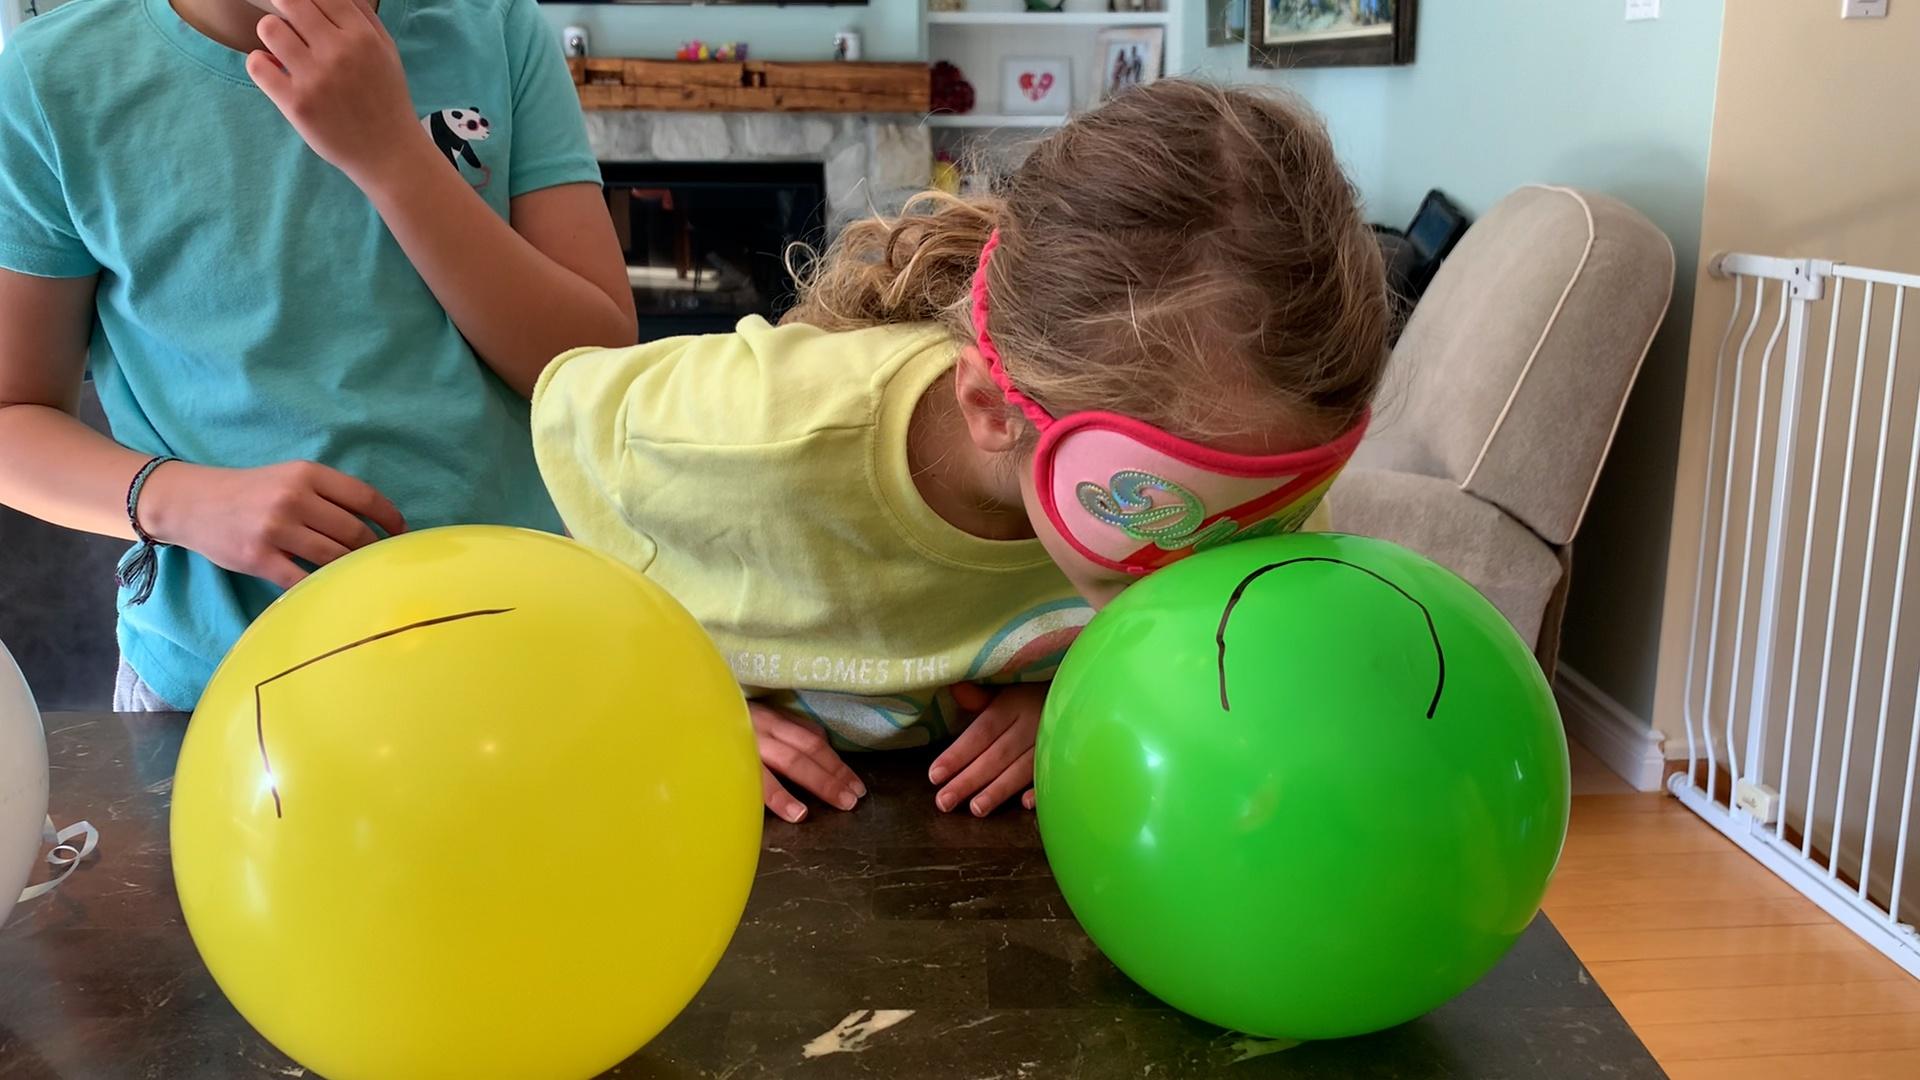
- Ask participants to smell each balloon and predict which scent extract is inside.
Safety Precautions
Do not try this experiment if you are allergic to latex. Do not overinflate balloons.
How does it work?
Tiny scent molecules are leaking out of the balloons. You can’t see them, but you can smell them!
Your sense of smell works by identifying the shape of scent molecules. Molecules are made of particles called atoms that bond together. Everything in the world is made of atoms, including the balloon you’re holding and the scented air inside it.
Scent molecules are so small that they can travel through the balloon’s semipermeable membrane. In fact, they’re so tiny that they’re measured in nanometers! A nanometer is a billionth of a meter.
Air gradually leaks out of a tied balloon because the molecules inside the balloon move through the pores of the balloon’s skin, in a process known as diffusion. Air always diffuses from areas of higher pressure to areas of lower pressure. An inflated balloon has greater air pressure than the air around it, so the air inside the balloon gradually escapes.
Nanoscale science focuses on the building blocks of our world, atoms and molecules. Scientists use special tools and equipment to detect and manipulate tiny, nanometer-sized particles.
In the field of nanotechnology, scientists and engineers make new materials and tiny devices. Researchers are creating tiny, nanometer-sized sensors that can detect very small concentrations of chemicals. Some of them work the way your nose does: by detecting the different shapes of molecules in the air.
New York State P-12 Science Learning Standards
The content in these videos and accompanying activities touch upon various concepts from the New York State Science Learning Standards.
Grade 5
- Structure and Properties of Matter
Middle School (Grades 6-8)
- Structure and Properties of Matter
- Chemical Reactions
Can Science Explain Maple Syrup's Deliciousness? | Watch
Join us on Compact Science as we explore the sweet science of maple syrup! Learn about the biology of maple trees, the physics of sap movement, and the chemistry of syrup production. Sarajane visits a sugarbush at Buffalo Niagara Heritage Village to see tapping in action. Learn about traditional and modern methods of tapping trees and producing this beloved breakfast staple.
Can Science Explain Maple Syrup's Deliciousness? | Biology
Topic: Capillary Action, Surface Tension
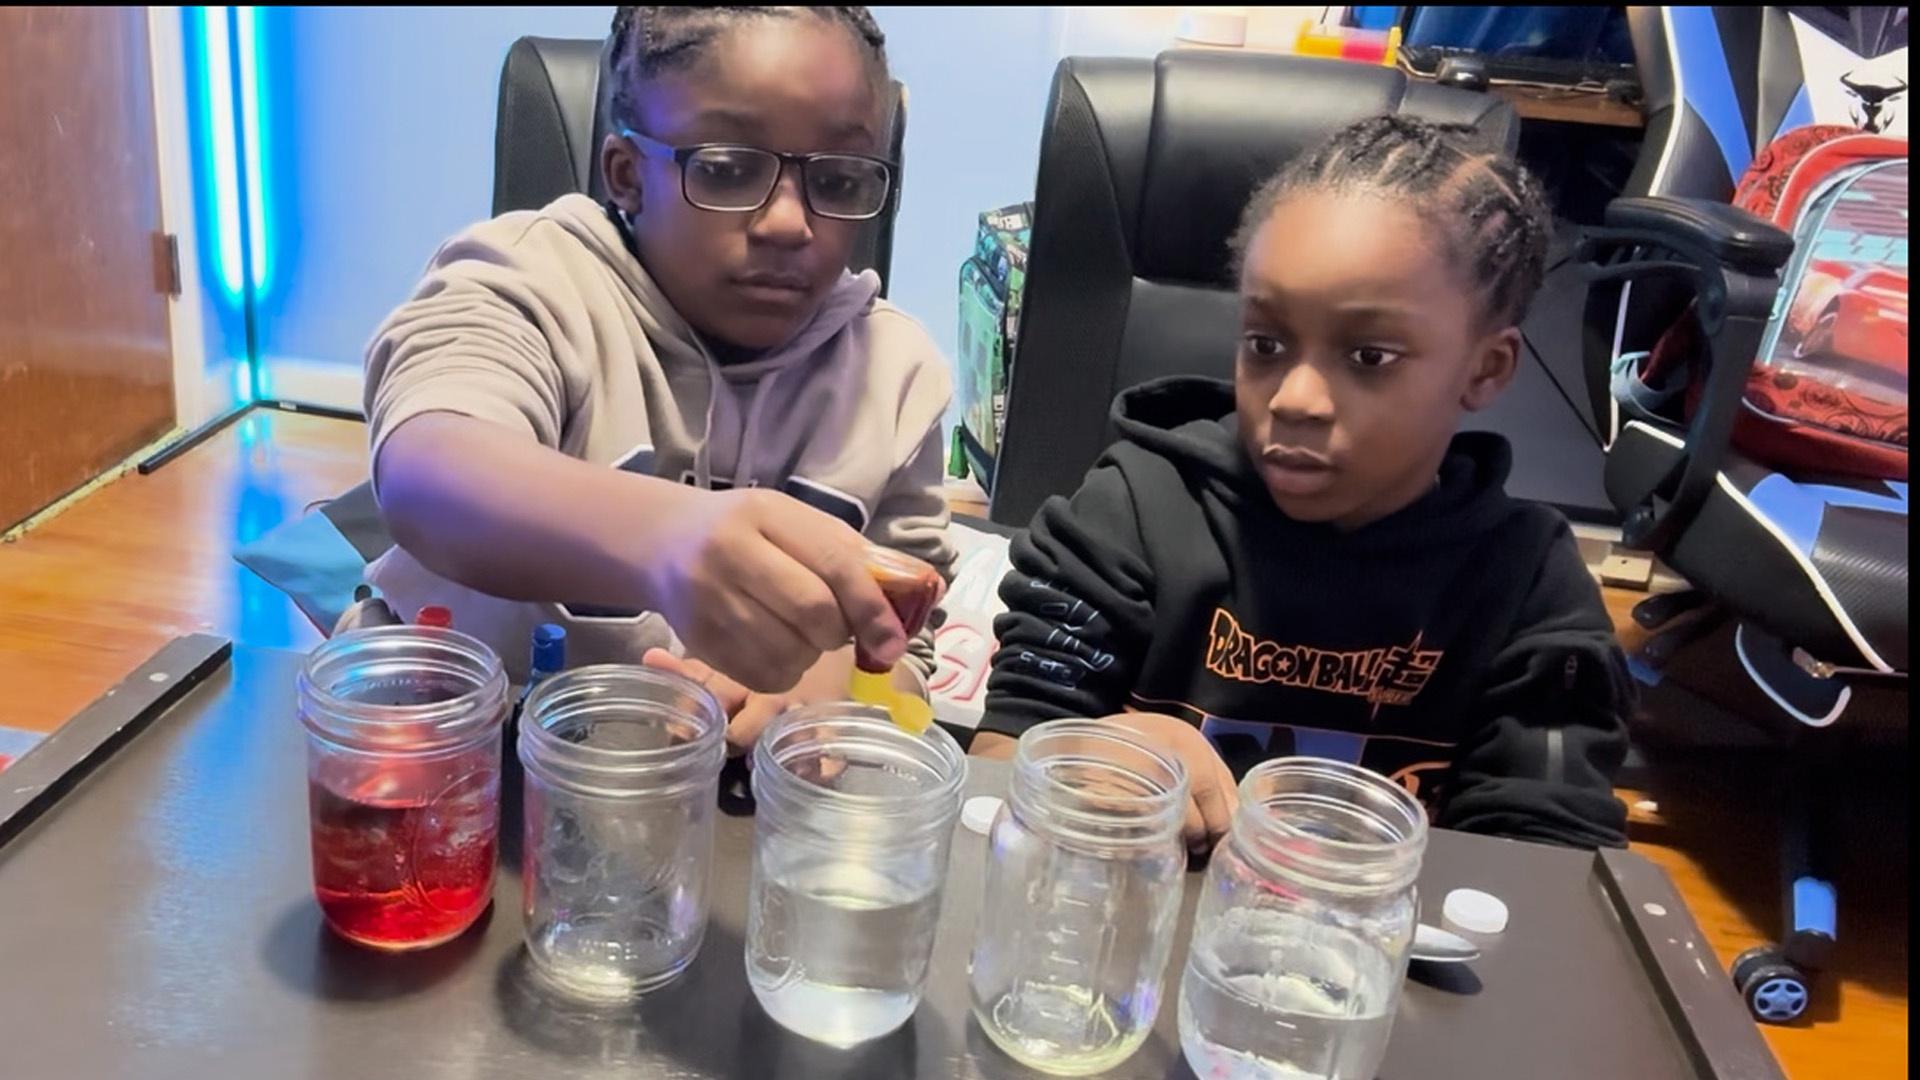
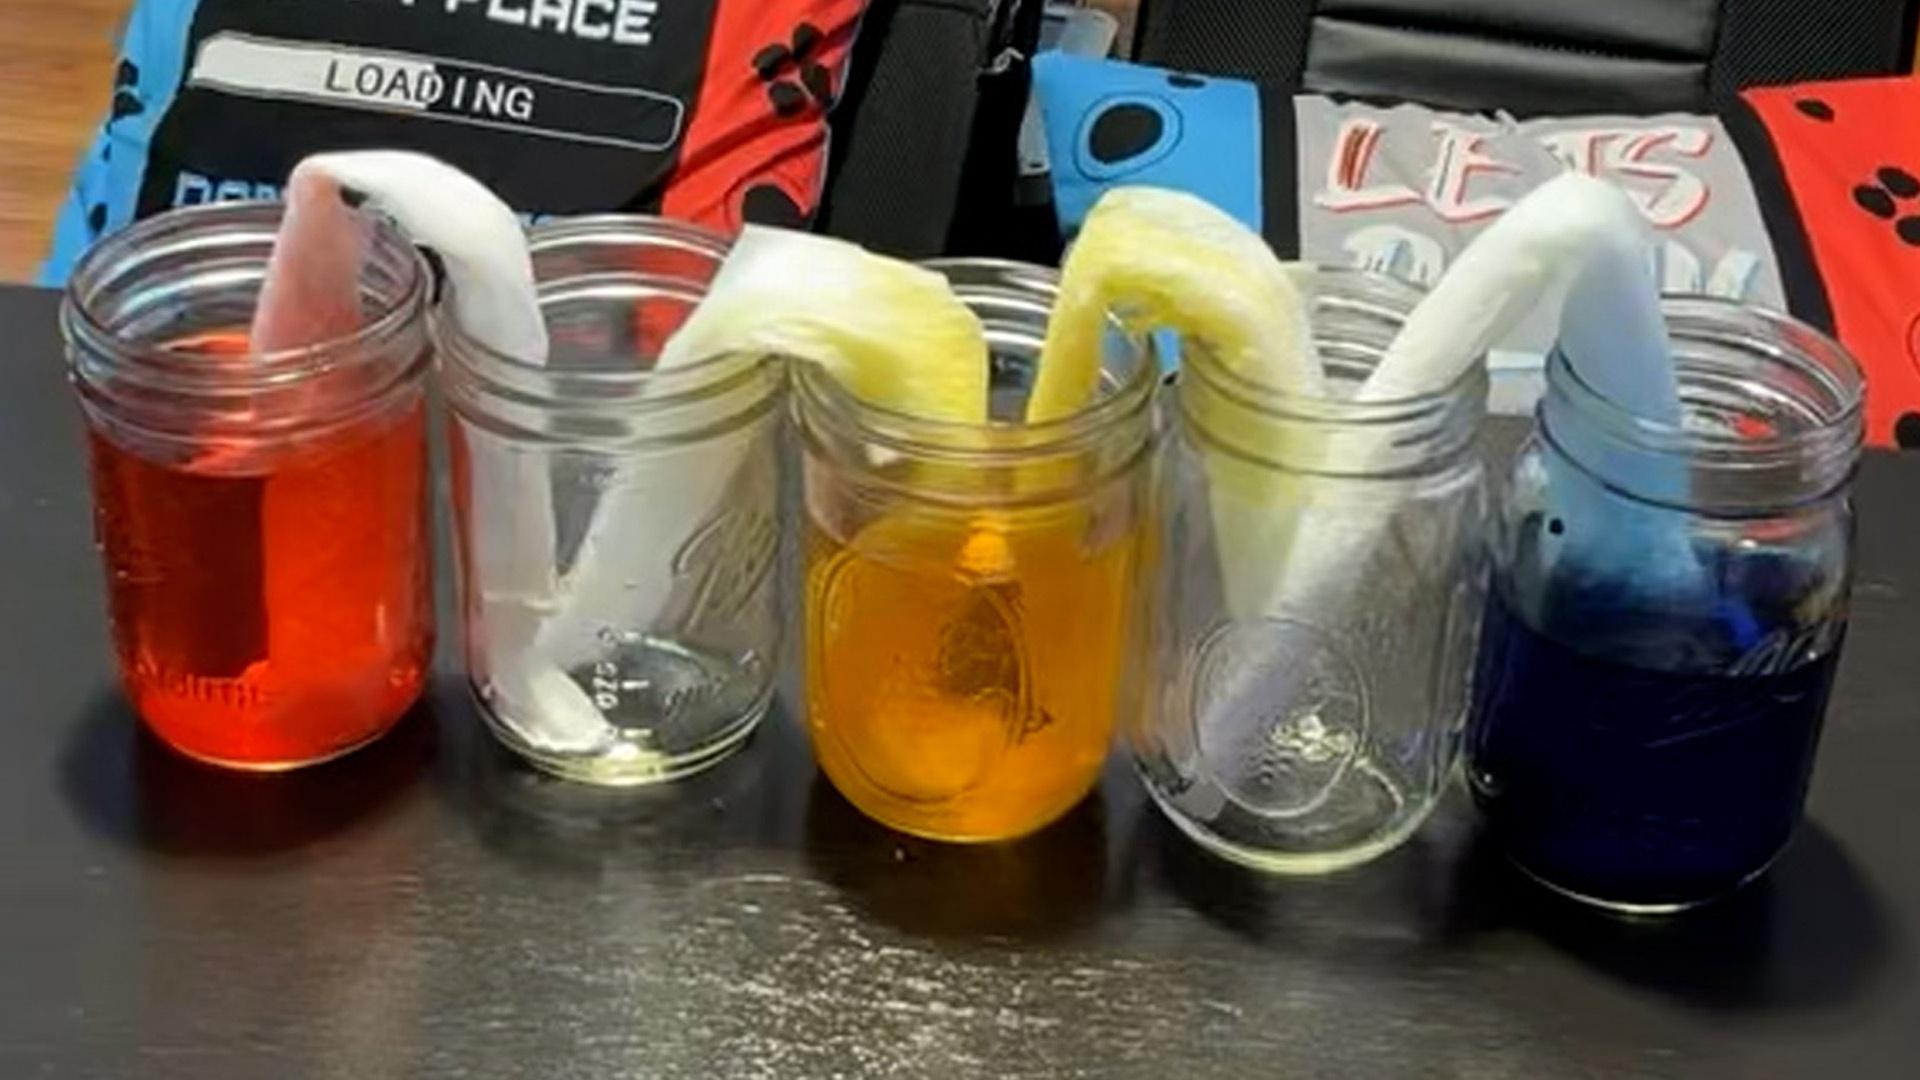
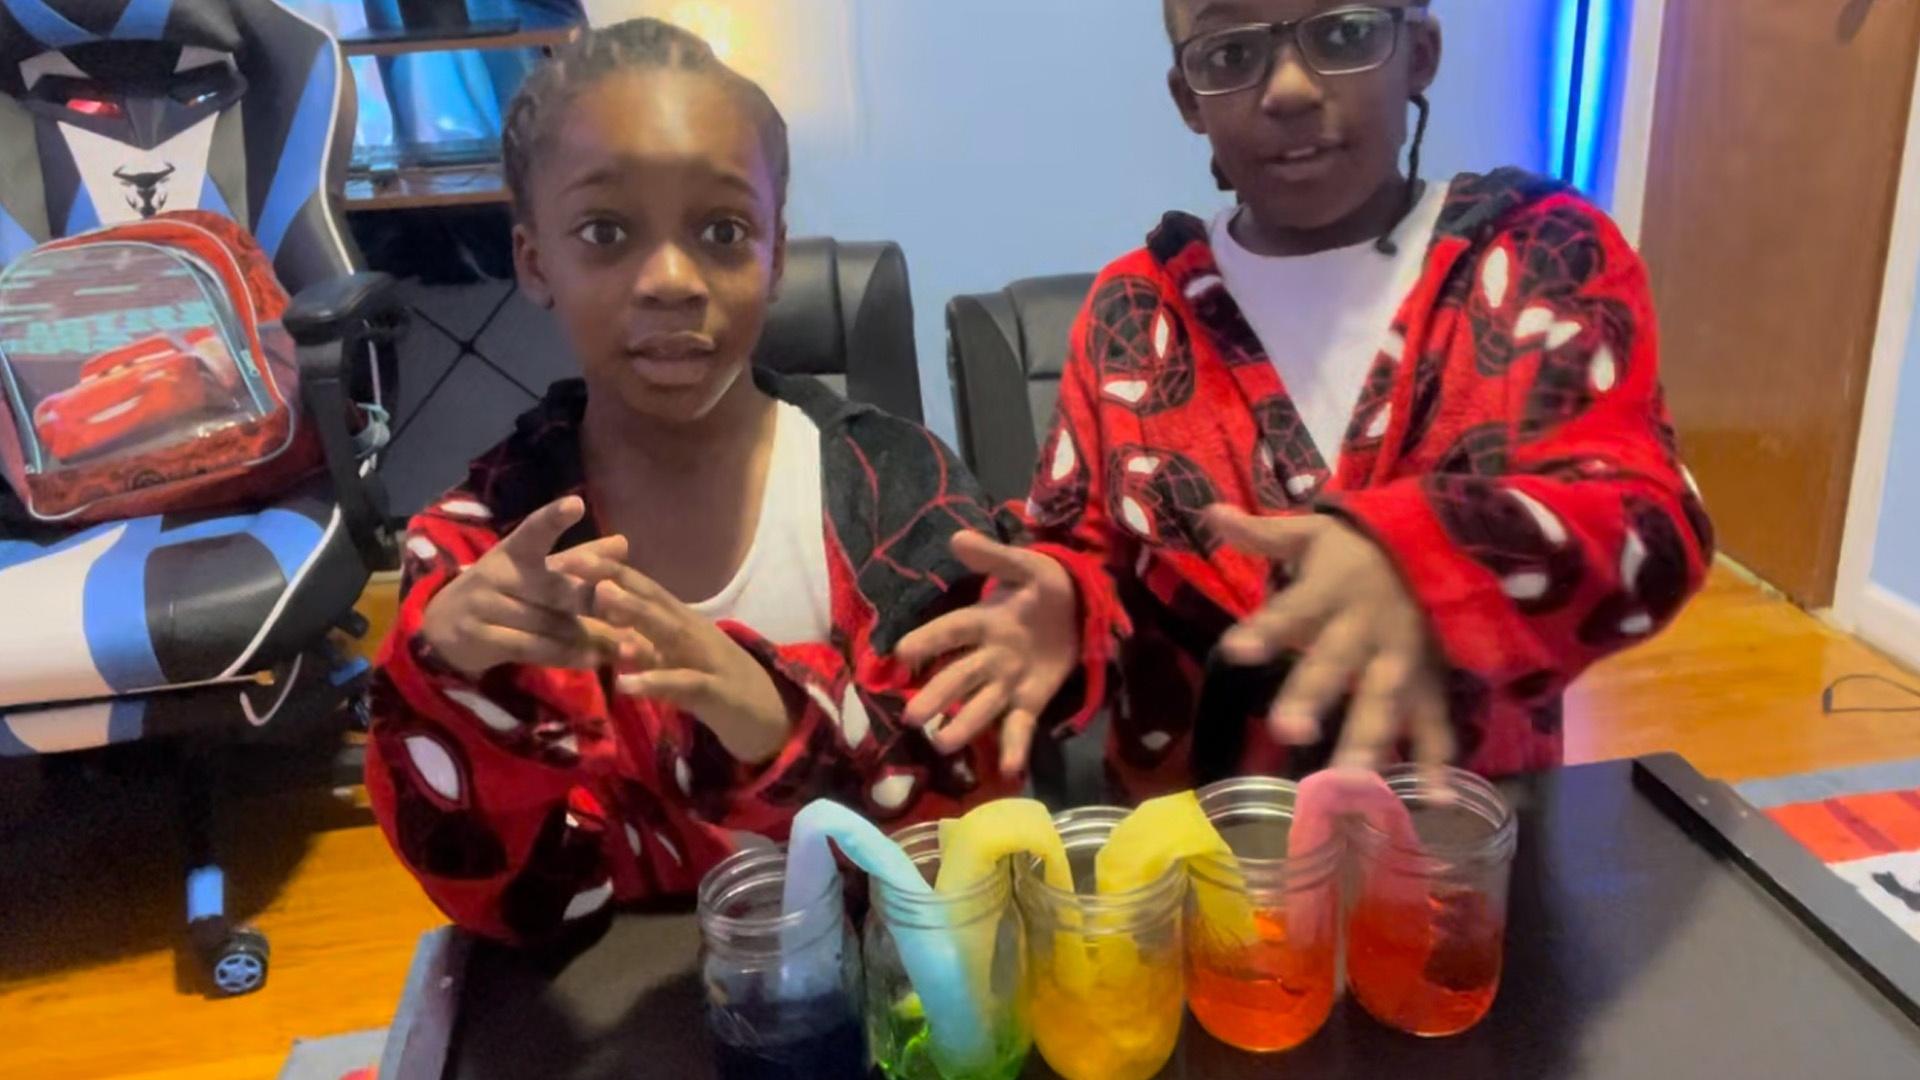
Viewer Challenge/At-Home Version: Walking Water |Capillary Action
Capillary action, the fascinating phenomenon of liquids moving through narrow spaces without external forces. Make water "walk" between glasses using nothing but paper towels.
Materials:
- 3-5 clear glasses or cups
- Water
- Food coloring
- Spoon
- Paper Towels
Directions:
- Line up all your glasses in a row.
- Starting with a glass on one end, fill every other glass with water.
- Put a few drops of food coloring in each water-filled glass. You can choose what colors to use, but don't use the same color twice in a row.
- Use the spoon to mix the food coloring in each glass. Use a paper towel to wipe off the spoon in between glasses, so you don't transfer the colors.
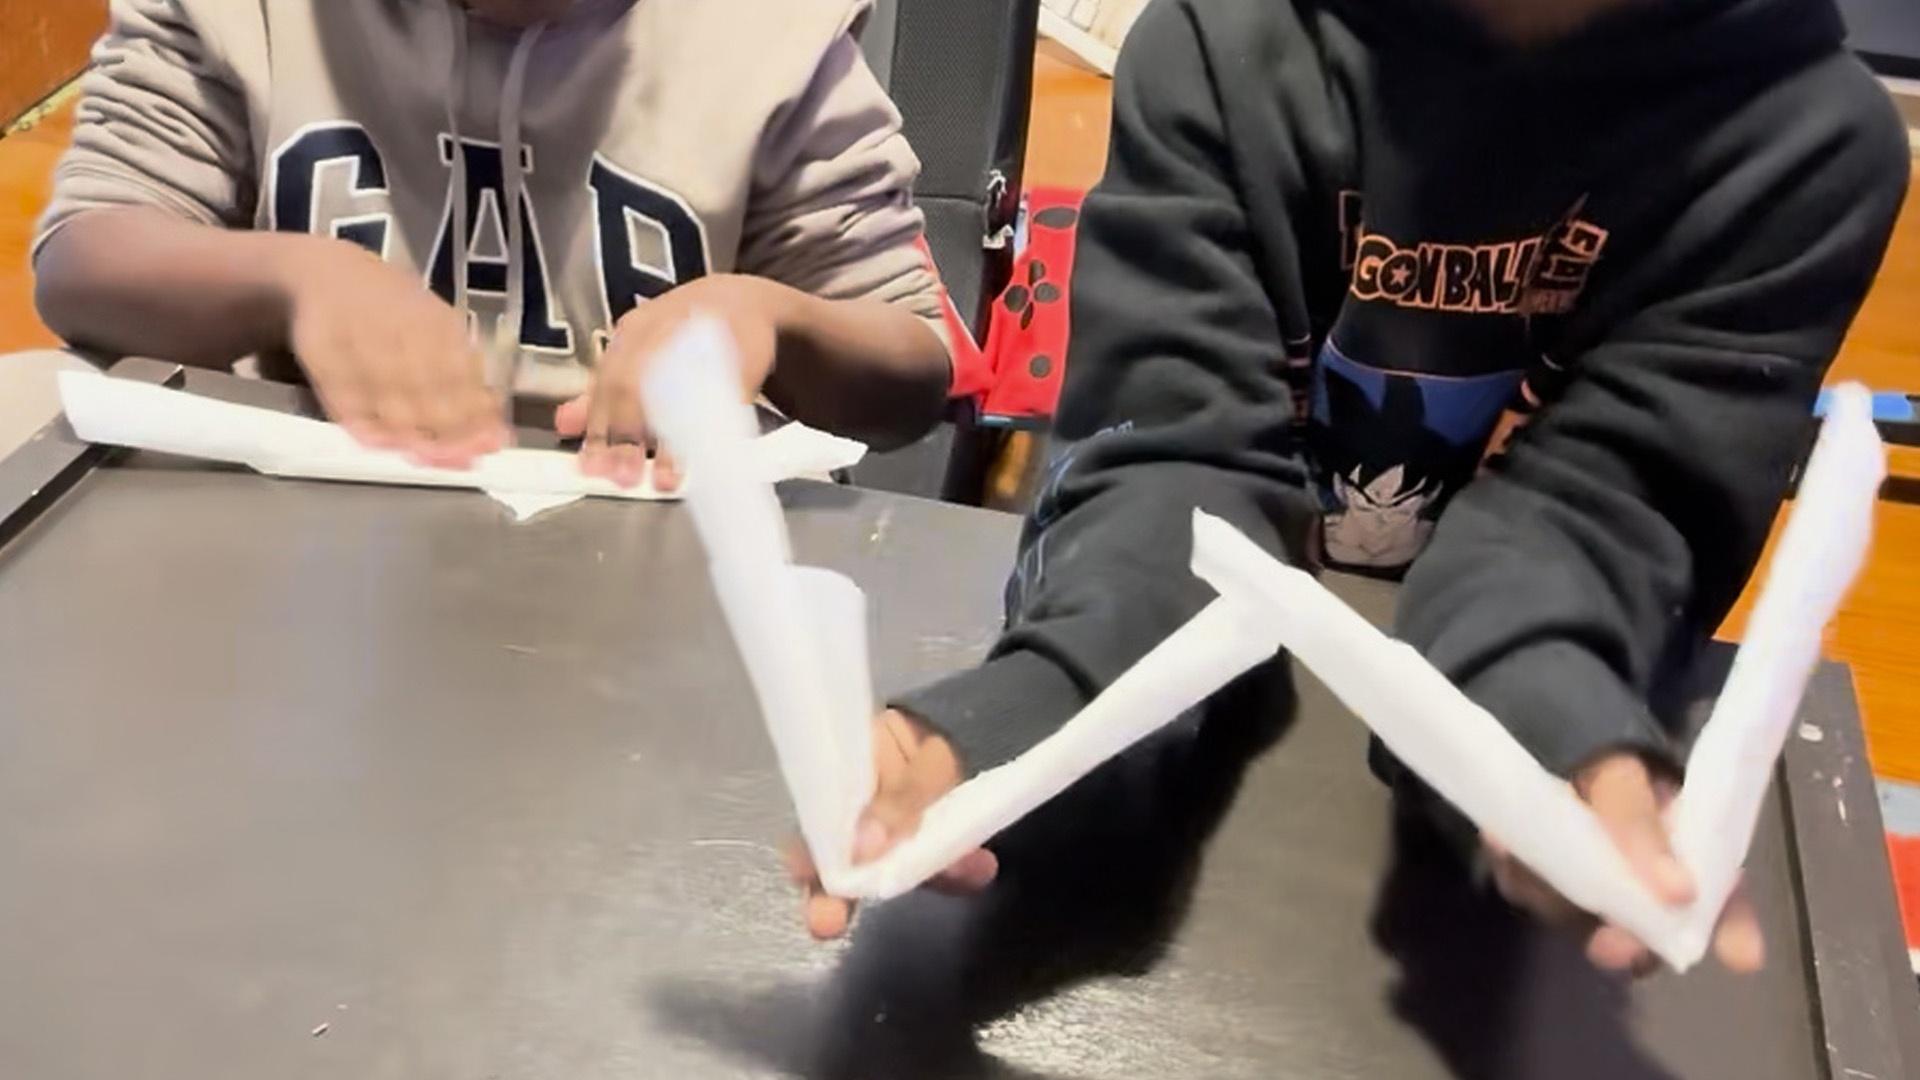
- Fold each half-sheet paper towel (except the one you used to clean the spoon) into a narrow strip about one inch wide.
- Fold each paper towel in half lengthwise to form a "V" shape. The V should be only slightly taller than your glasses. If necessary, rip or cut a little bit off each end of the V to make it shorter.
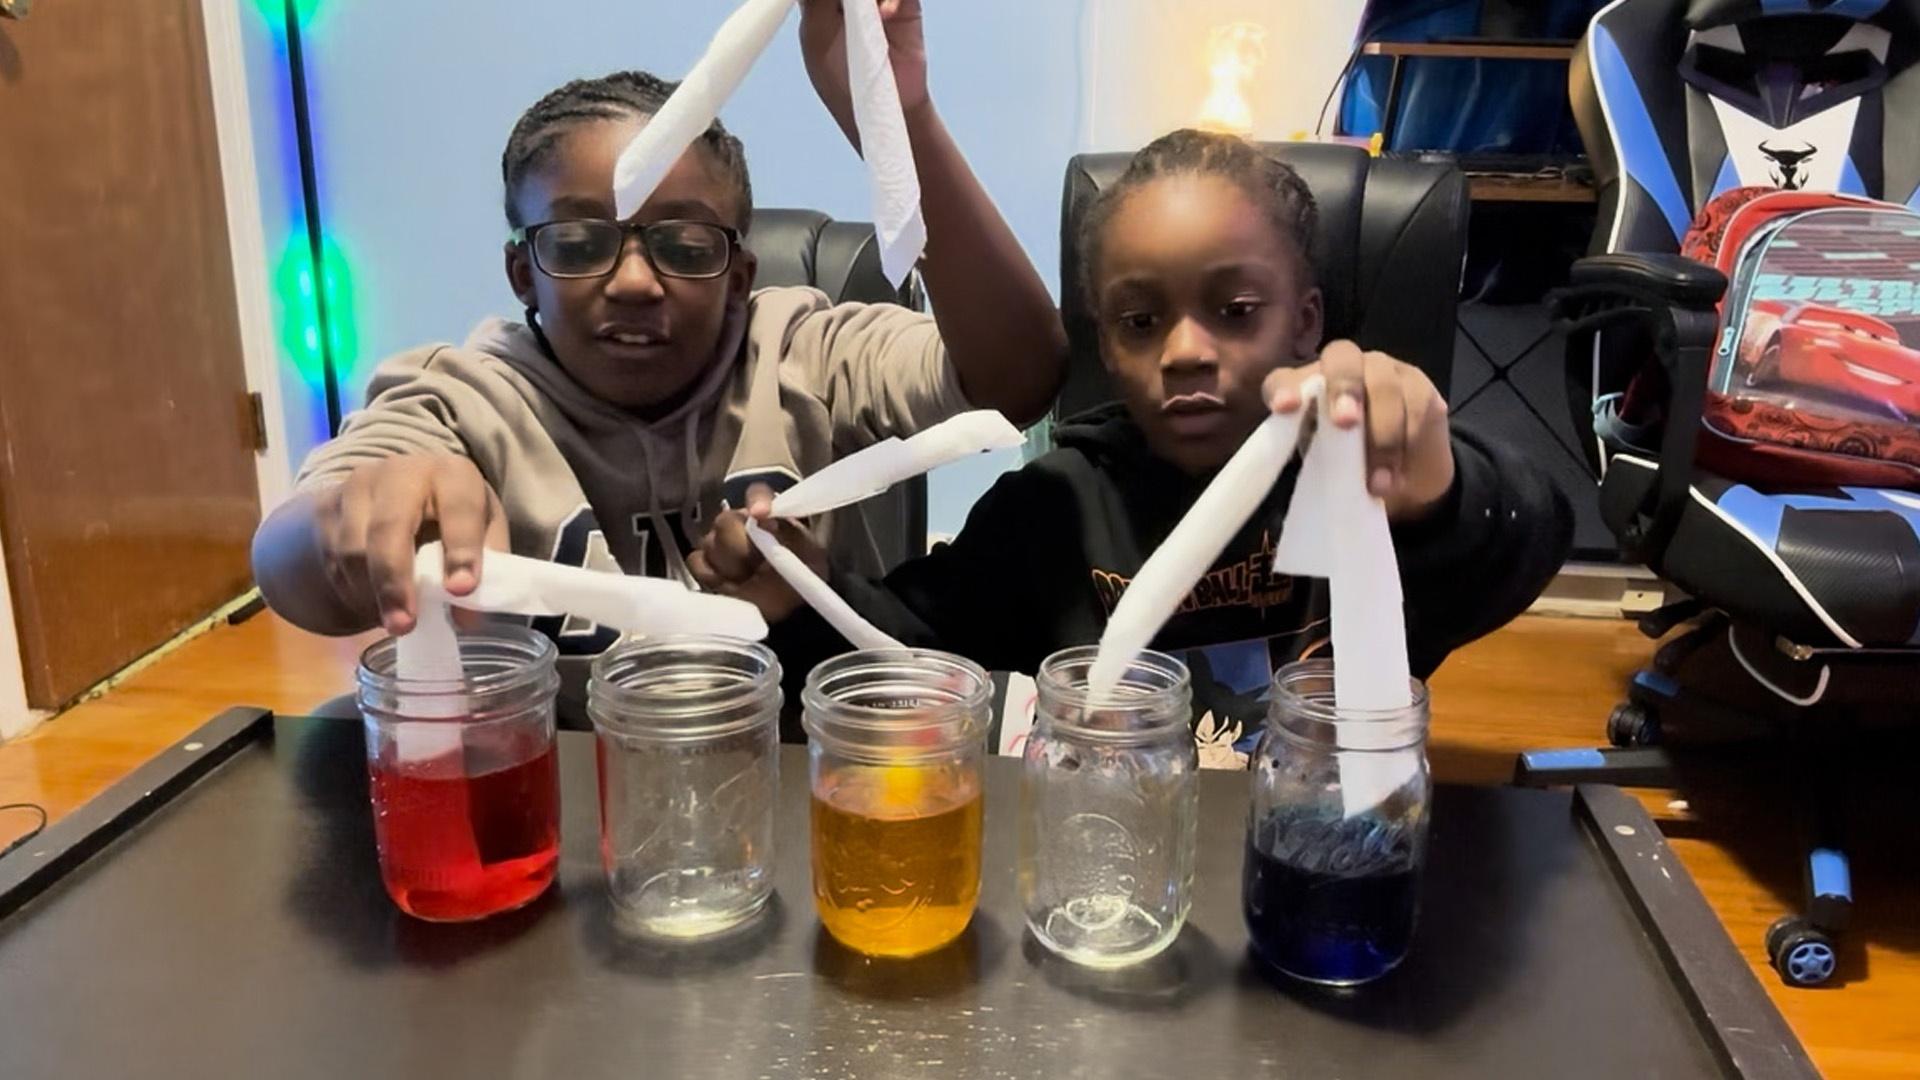
- Use one paper towel to connect each pair of adjacent glasses. (Flip the V shape upside-down and put one end in each cup.)
- Look closely at the ends of the paper towels that are in the glasses with water. What do you notice?
- Take a break! This experiment goes very slowly. Come back in 15 or 20 minutes. What do you see now?
- Keep checking on your setup over the next couple of hours. What happens?
- Let your test sit overnight and check on it the next day. What does it look like now?
How does it work?
As soon as you place the paper towels in the glasses, you should notice they start to absorb some of the water. The water starts getting sucked up the paper towel due to capillary action and eventually starts going down the other side into the empty glass. This process happens very slowly though—it is like watching paint dry or the clock slowly inch towards recess! You might need to go do something else for a couple hours before you can start seeing water accumulate in the empty glasses. The water will eventually stop flowing when the water level in all the cups is even—but you will probably have to let it sit overnight before this happens. When two different colors of water mix, the food-coloring dyes combine to form a third color.
Paper towels are made of many small fibers that have gaps in between them. Water gets pulled into these gaps by capillary action—the same phenomenon that allows trees to suck water out of the ground. This action is partially fueled by surface tension, which is caused by cohesion (water molecules being attracted to one another). Surface tension is what allows water to form beads instead of spreading out, and for some small insects to walk on water. It also allows water to get sucked up into narrow tubes or gaps in materials. The absorption process is also aided by adhesion (the attraction between different types of molecules). The paper towel fibers are made of cellulose, which also comprises wood and many plants. These fibers are polar, meaning they have a slight positive charge on one end and a slight negative charge on the other. Water molecules are also polar. Because opposite electric charges are attracted to each other, this results in the water molecules being attracted to the cellulose fibers. Ultimately, this means the water molecules can be sucked up through the paper towel and into an adjacent cup. After going over the top, the way back down is a little easier, since this time they are aided by gravity. As you noticed, this process is very slow! Plants and trees couldn’t survive without capillary action.
New York State P-12 Science Learning Standards
The content in these videos and accompanying activities touch upon various concepts from the New York State Science Learning Standards.
Grade 4
- Structure, Function, and Information Processing
Grade 5
- Structure and Properties of Matter
- Matter and Energy in Organisms and Ecosystems
Middle School (Grades 6-8)
- Structure and Properties of Matter
- Structure, Function and Information Processing
- Matter and Energy in Organisms and Ecosystems
Pascal's Law at Work: Unlocking the Secrets of Erie Canal's Navigation | Watch
Discover the science behind Erie Canal's locks! Sarajane navigates through history and physics, revealing how this 19th-century marvel transformed commerce. Explore the principles that powered westward expansion and revolutionized transportation. Unlock the secrets of one of America's most iconic waterways from the intricacies of canal navigation to the ingenuity of hydraulic engineering!
Fifteen Miles on the Erie Canal | Mechanical Engineering
Topic: Physics, Liquids, Geometry, Engineering
Viewer Challenge/At-Home Version:
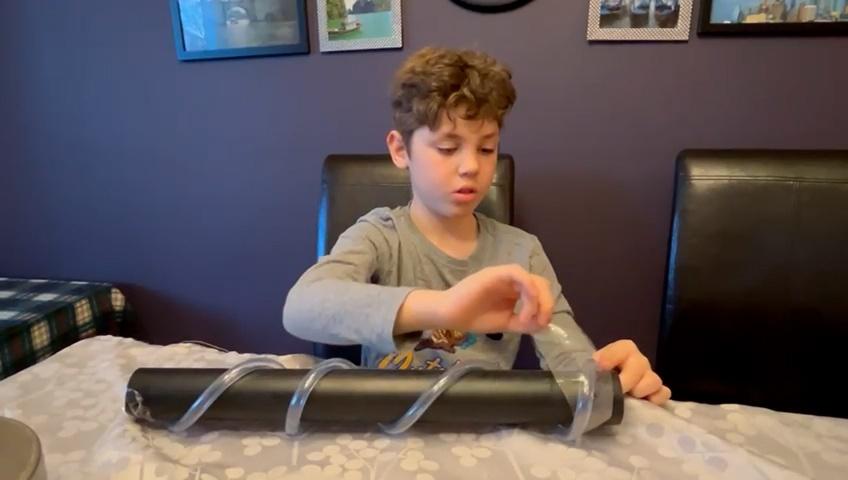
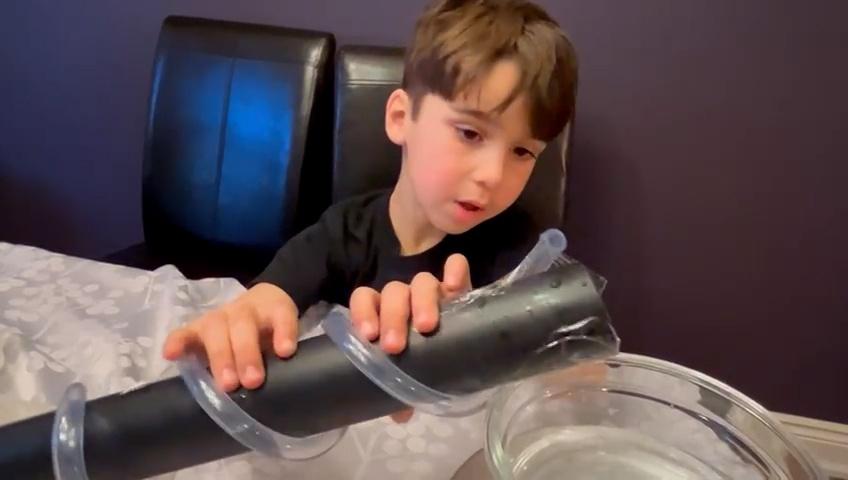
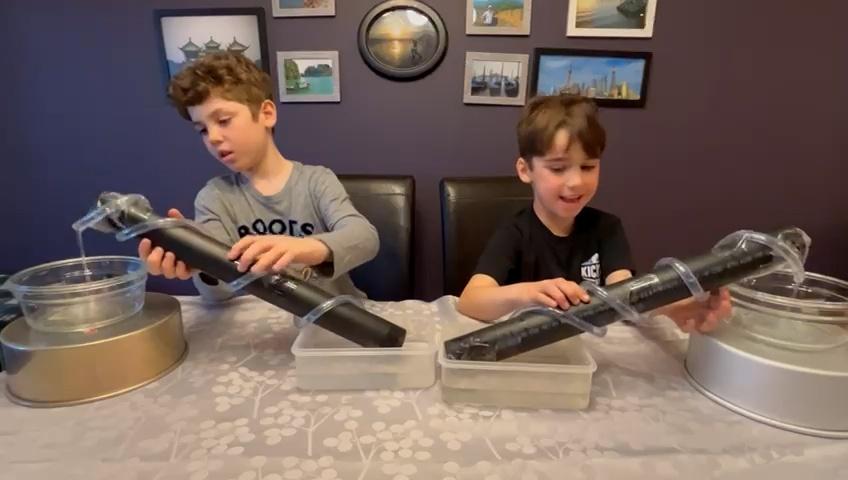
Lift Water with and Archimedes’ Screw Pump
Amaze your friends with water that flows uphill! It’s not magic, it’s science. In this Viewer Challenge, you will build a very simple pump, called an Archimedes screw, to transfer water from a low-lying location to a higher location.
Materials:
- 1PVC pipe (at least 1 inch in diameter and at least 1 foot long)
- Clear vinyl tubing (at least 1/4 inch diameter and at least 2 feet long)
- Duct tape
- Scissors
- Two containers for water
- Two items to elevate one of the containers, such as small boxes, books or additional containers
- An adult helper
- Towel for cleaning up spills (optional)
- Food coloring (optional)
- Different diameters and lengths of PVC pipe (optional)
- Different diameters of vinyl tubing (optional)
Directions:
- Attach one end of the vinyl tubing to one end of the PVC pipe with duct tape. Ensure that the opening to the tubing is open (and not blocked by the tape).
- Tightly wrap the tubing around the pipe in a spiral.
- Attach the tubing to the other end of the pipe with duct tape, again being careful to not block the opening of the tubing.
- Have an adult help use scissors to cut off any extra tubing.
- If necessary, use extra pieces of duct tape to evenly space out the tubing along the length of the pipe.
- Attach one end of the vinyl tubing to one end of the PVC pipe with duct tape. Ensure that the opening to the tubing is open (and not blocked by the tape).
- Tightly wrap the tubing around the pipe in regular intervals in a spiral until you come to the other end of the pipe.
- Attach the tubing to the other end of the pipe with duct tape, again being careful to not block the opening of the tubing.
- Have an adult help use scissors to cut off any extra tubing.
- If necessary, use extra pieces of duct tape to evenly space out the tubing along the length of the pipe.
- Fill one of your containers with water. Optionally, you can add food coloring to make the water easier to see when it is in the tubing.
- Elevate the second (empty) container so it is higher than the first container.
- Place one end of your Archimedes screw in the lower container of water and align the other end over the upper container.
- Rotate the screw so the bottom end of the tubing "scoops" water with each rotation. It should go underwater and then come back above the surface with each revolution and not remain completely submerged the entire time. If you do not see your tubing start to fill with water after a few rotations, you might be spinning the screw the wrong direction. When you look at your screw from the side, what do you see? How is the water distributed in the tubing?
- Keep rotating the screw and watch as the water moves up into the higher container!
- Try different ways of using your Archimedes screw. How high can you lift water? Raise the upper container and tilt the screw upward at a steeper angle. Do you reach a point where water starts to flow back down the tube instead of up
Extra: Try different designs of your Archimedes screw. What happens if you change the spacing of the tubing spiral, making the individual turns closer together or farther apart? What if you change the diameter of the PVC pipe or the tubing?
How does it work?
The Archimedes screw is a positive-displacement pump. A positive-displacement pump traps an amount of fluid from a source and then forces the fluid to move to a discharge location. The Archimedes screw is made up of a hollow cylinder and a cylindrical core. The core sits inside of the hollow cylinder. Helical blades (the plastic tubing in our experiment) are wound around the core and are secured tightly against the hollow cylinder. When you bend the tubing into a spiral shape, it forms individual pockets where water can get trapped because the tubing curves upward on both sides. If you look at your screw from the side, you will see these pockets filled with water. As you rotate the screw it traps alternating pockets of air and water, and the individual pockets move up the screw to the upper container. If you tilt the screw up at too steep of an angle, eventually one side of each pocket will point downhill allowing the water to flow back down. This is easiest to see if you stand the pipe up vertically—notice how there is nowhere for the water to get "trapped" without flowing downhill.
Background:
Archimedes of Syracuse was born in the 3rd century BC. He was one of the most important inventors of his time because he liked to solve problems. The King of Syracuse requested that Archimedes build the biggest luxury ship possible. This ship proved to be leaky and Archimedes had to design a device to rid the hull of bilge water. So he designed the Archimedes screw. The screw was very effective because it got rid of the water and only required one person to operate it. The Archimedes screw was also used to transport water from low-lying areas up to irrigation ditches. The design is so effective that it is still being used in many modern-day applications.
New York State P-12 Science Learning Standards
The content in these videos and accompanying activities touch upon various concepts from the New York State Science Learning Standards.
Grade 3
- Forces and Interactions
Middle School (Grades 6-8)
- Structure and Properties of Matter
Explore Western New York’s Devonian Past | Watch
Join us on a fossil-hunting adventure in Western New York as we unearth creatures from an ancient undersea environment that existed nearly 400 million years ago. In this episode, Sarajane visits Penn Dixie Fossil Park. From horn corals to trilobites, we explore the geologic secrets hidden in rocks, revealing ancient marine life and the process of fossilization.
Exploring WNY's Devonian Past | Geology
Topic: Geology, Fossils, Paleontology
Viewer Challenge/At-Home Version:
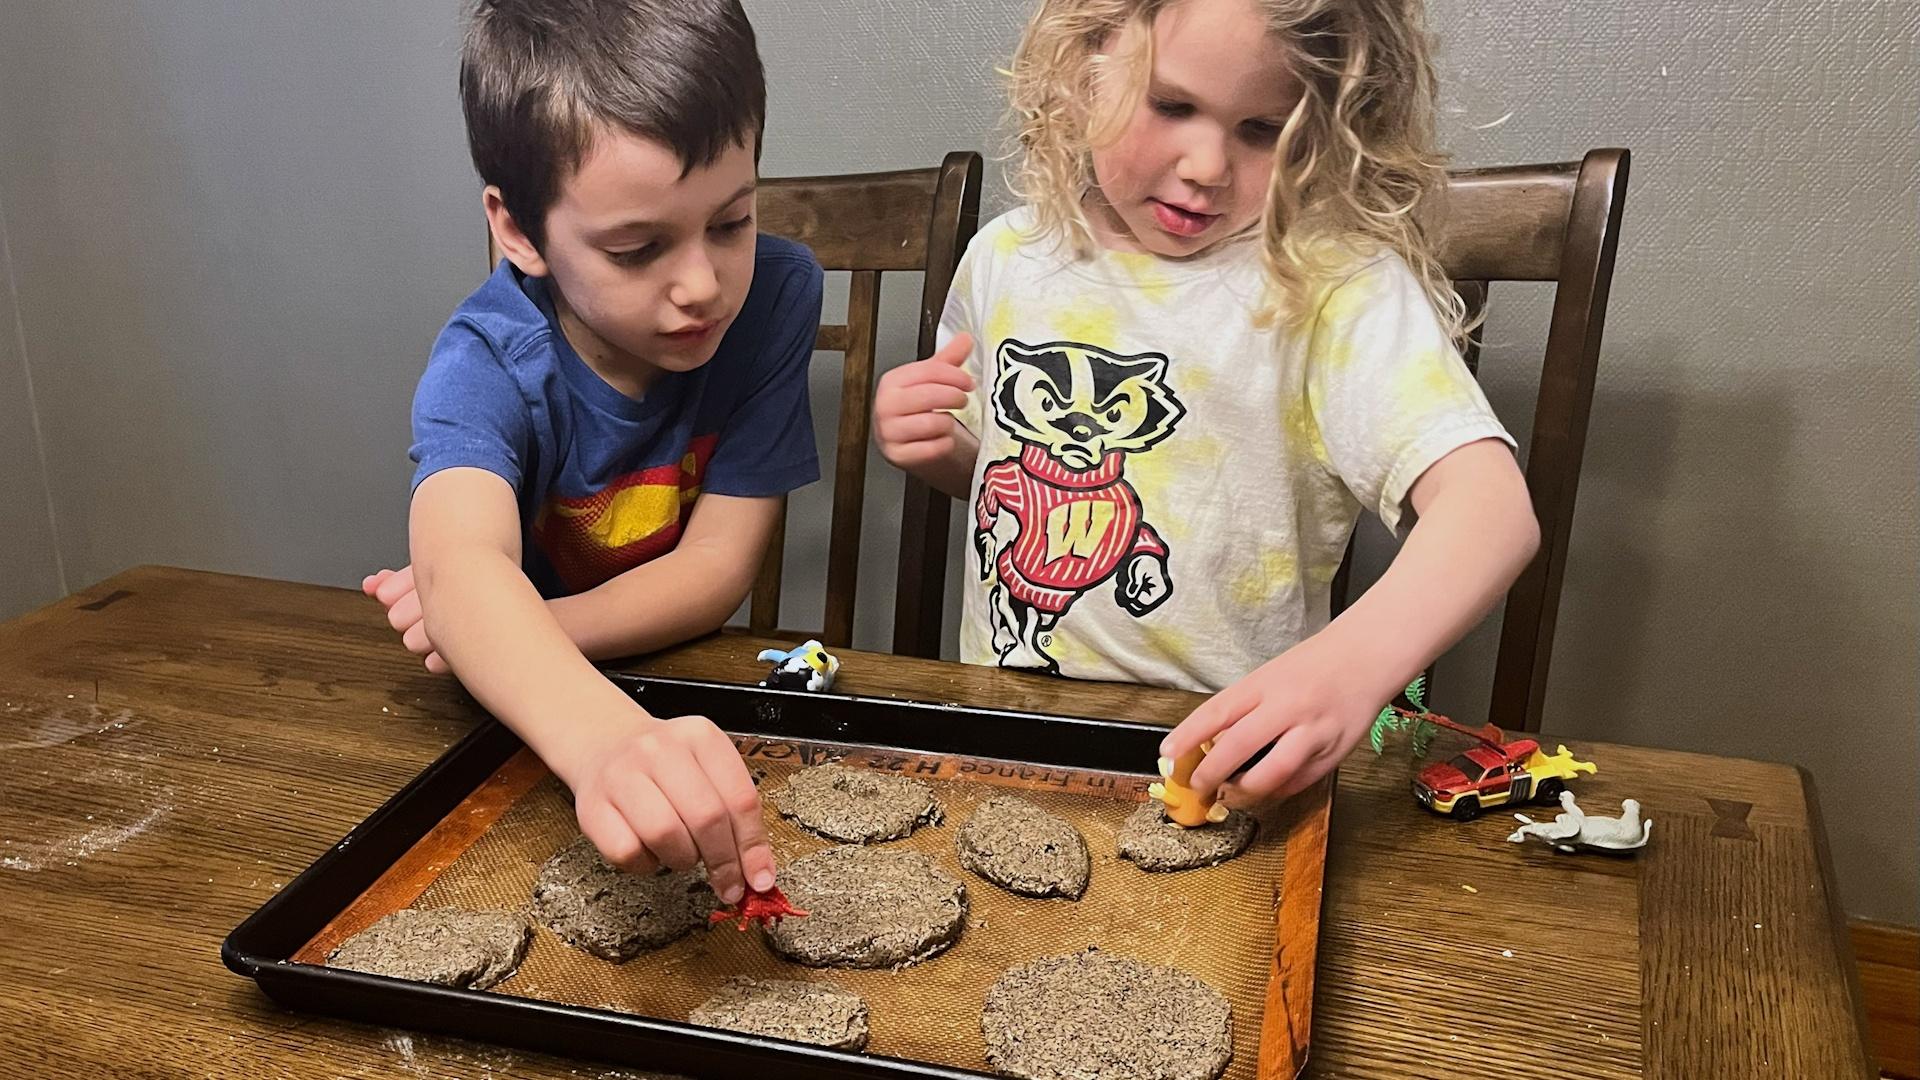
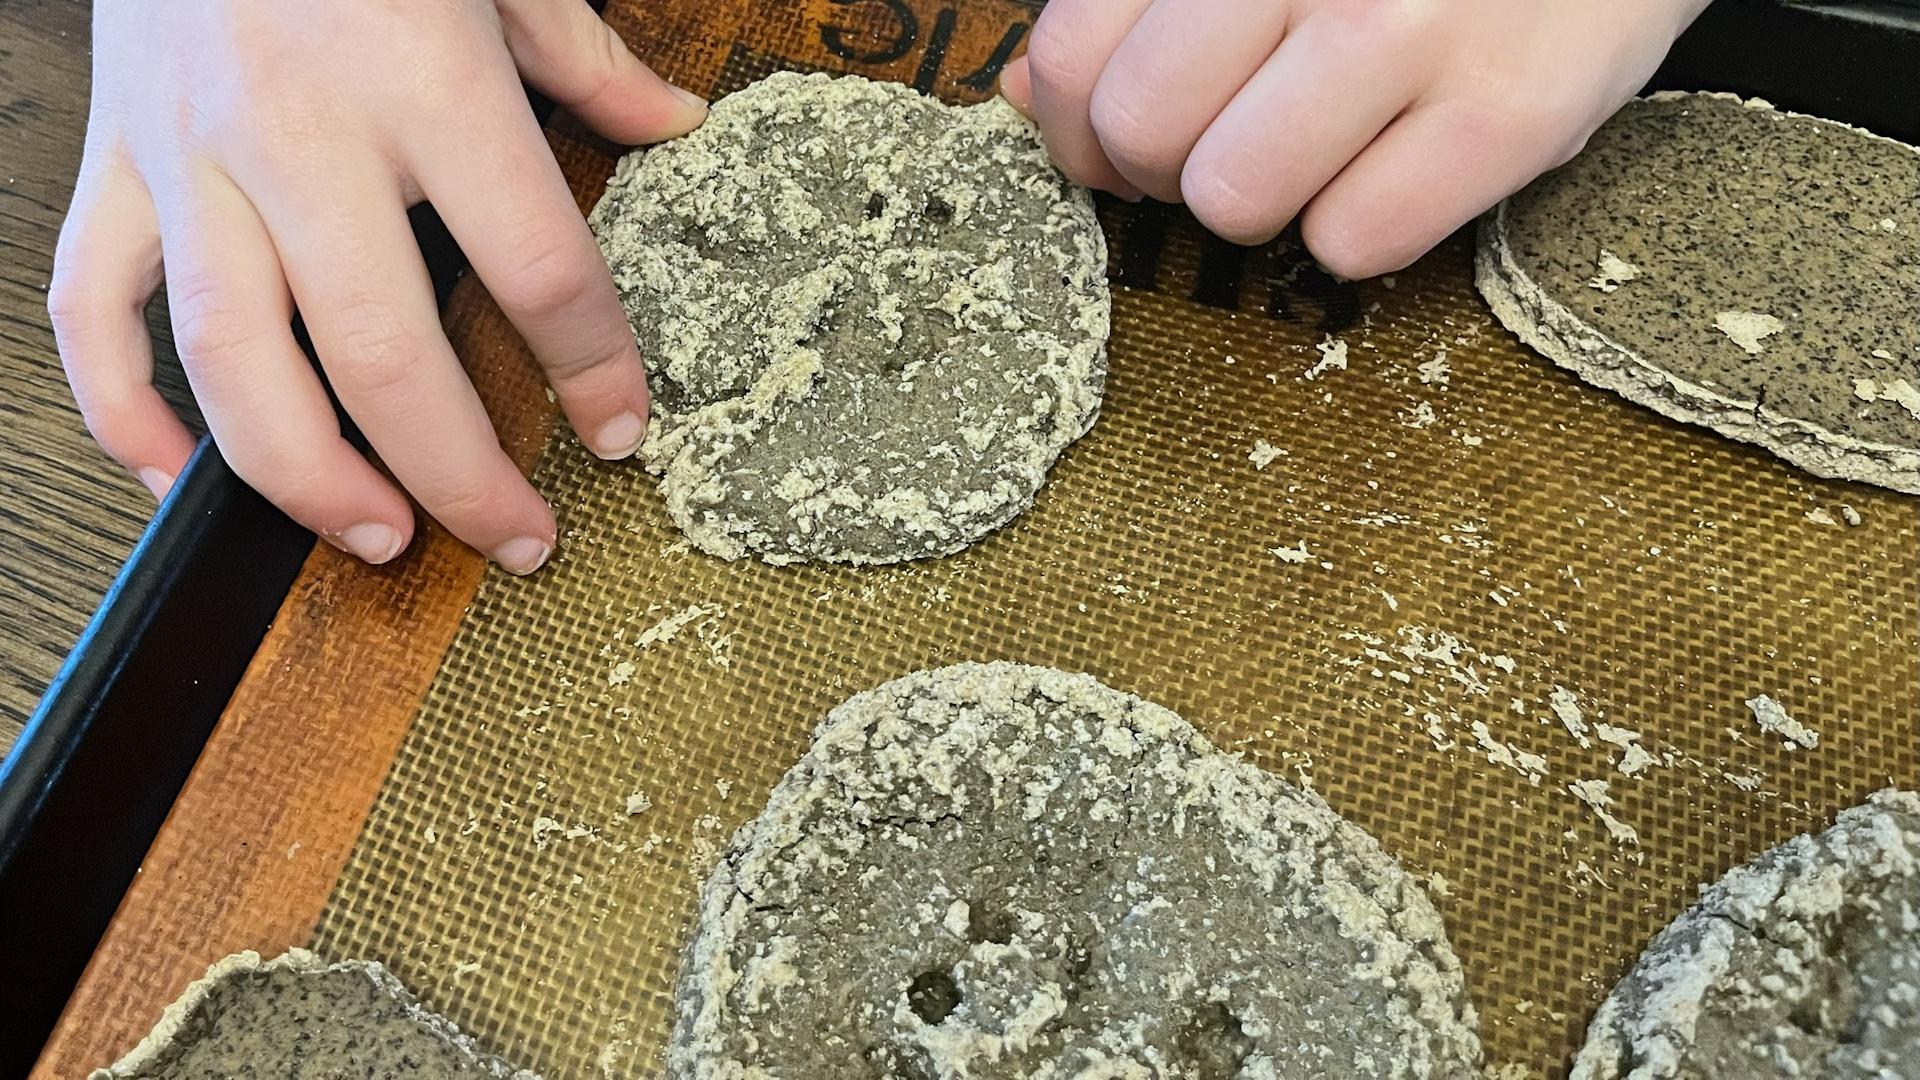
DIY Fossils!
Create your own fossils with items found in your kitchen!
Materials:
- 1 cup of used coffee grounds
- ½ cup cold coffee
- 1 cup of all-purpose flour
- ½ cup of salt
- Wax or parchment paper
- Mixing bowl
- Small objects (small toy dinosaurs, seashells, starfish, etc.) to make impressions
- An empty can, a butter knife, or a cookie cutter
Directions:
- Let a grown-up brew a small amount of coffee (or make a little extra in the morning) and save the grounds. Allow the coffee to cool.
- Mix the coffee grinds, flour, and salt together in a bowl. Slowly add the coffee bit by bit and mix with the dry ingredients until the mixture forms a dough. The amount of coffee you need depends on how wet the coffee grounds are.
- Scoop the dough out onto the wax or parchment paper. Knead for 3-4 minutes, until the dough holds its shape and becomes less sticky.
- Use the can to cut circles out of the dough. You can also use cookie cutters or a butter knife to cut out fun shapes.
- Press the small objects firmly into the dough to create an imprint. Remove the object.
- You can use a toothpick to poke a small hole near the edge of the coffee ground fossils if you want to hang it later.
- Bake at 200°F for 45 minutes. Larger or thicker fossils may take longer to completely harden. Or you could leave the fossils for 2-3 days to air dry.
How does it work?
It’s really hard to make your own, real fossils. If you had your own dinosaur, first you’d have to bury it in layers and layers of dirt. Then, make sure there are no pockets in the sediment where air and water can reach the rock, and then wait tens of thousands of years. Voilà! You have fossilized dinosaur bones and teeth!
Most fossils are formed when a plant or animal dies in a watery environment and then is rapidly buried in mud and silt. The soft parts of the plants and animals break down leaving the hard bones or shells behind. Over time, small particles called sediment build up over the top and harden into rock. These clues of the remains of these animals and plants are preserved for scientists to find thousands of years later. These types of fossils are called body fossils. Sometimes only the activity of the plants and animals are left behind. These types of fossils are called trace fossils. Think about footprints, burrows, trails, food remains etc.
New York State P-12 Science Learning Standards
The content in these videos and accompanying activities touch upon various concepts from the New York State Science Learning Standards - Grades 3-5 and Middle School (Grades 6-8).
Grade 4
- Earth’s Systems: Processes that Shape the Earth
Grade 5
- Earth’s Systems
Middle School (Grades 6-8)
- History of Earth
- Earth’s Systems
The Path of Totality | Watch
A total eclipse is one of the rarest and most spectacular events in nature. For the first time since 1925, Western New York will experience a total solar eclipse – an amazing celestial event when the light of the sun is completely blocked out by the moon. In this episode of Compact Science Sarajane explores the science of eclipses and unravels why the 2024 solar eclipse is such a big deal!
The Path of Totality | Astronomy
Topic: Solar Eclipse, Orbits, Theory of General Relativity
Viewer Challenge/At-Home Version:
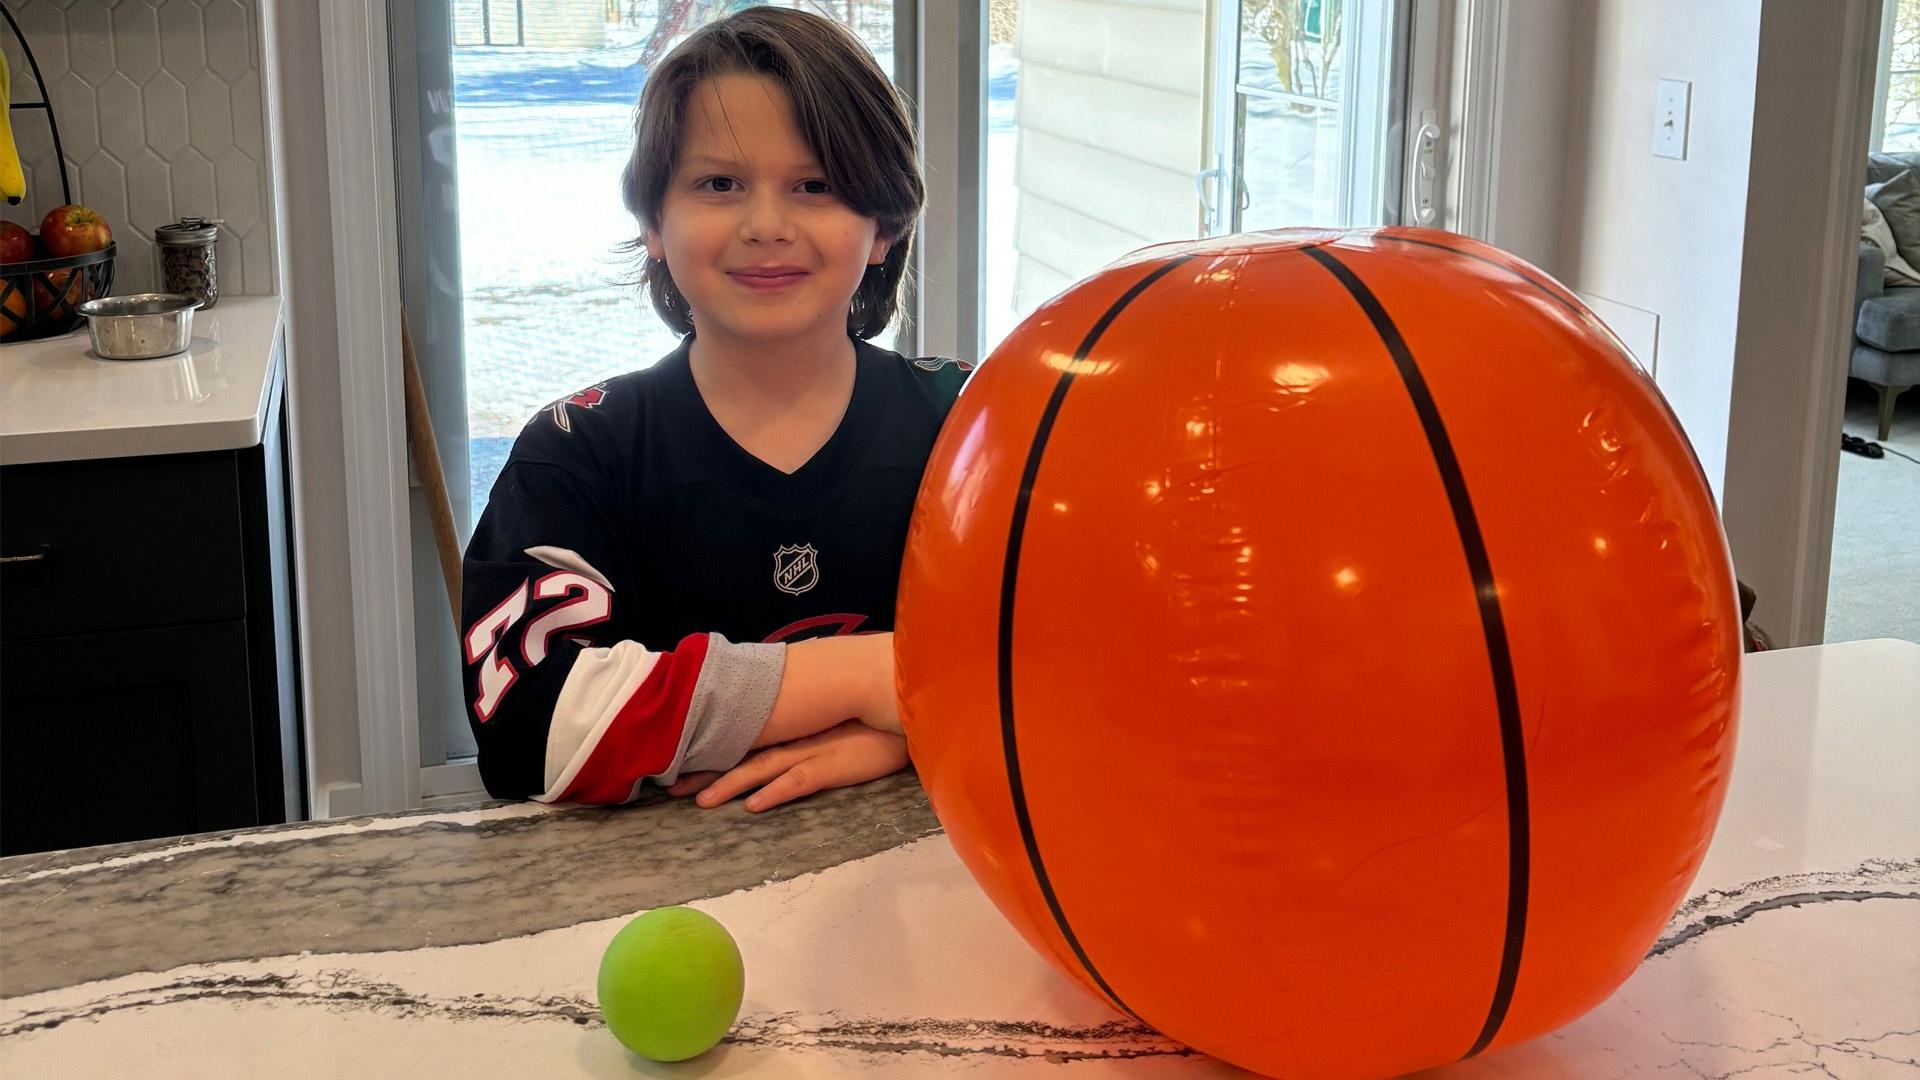
Big Sun, Small Moon
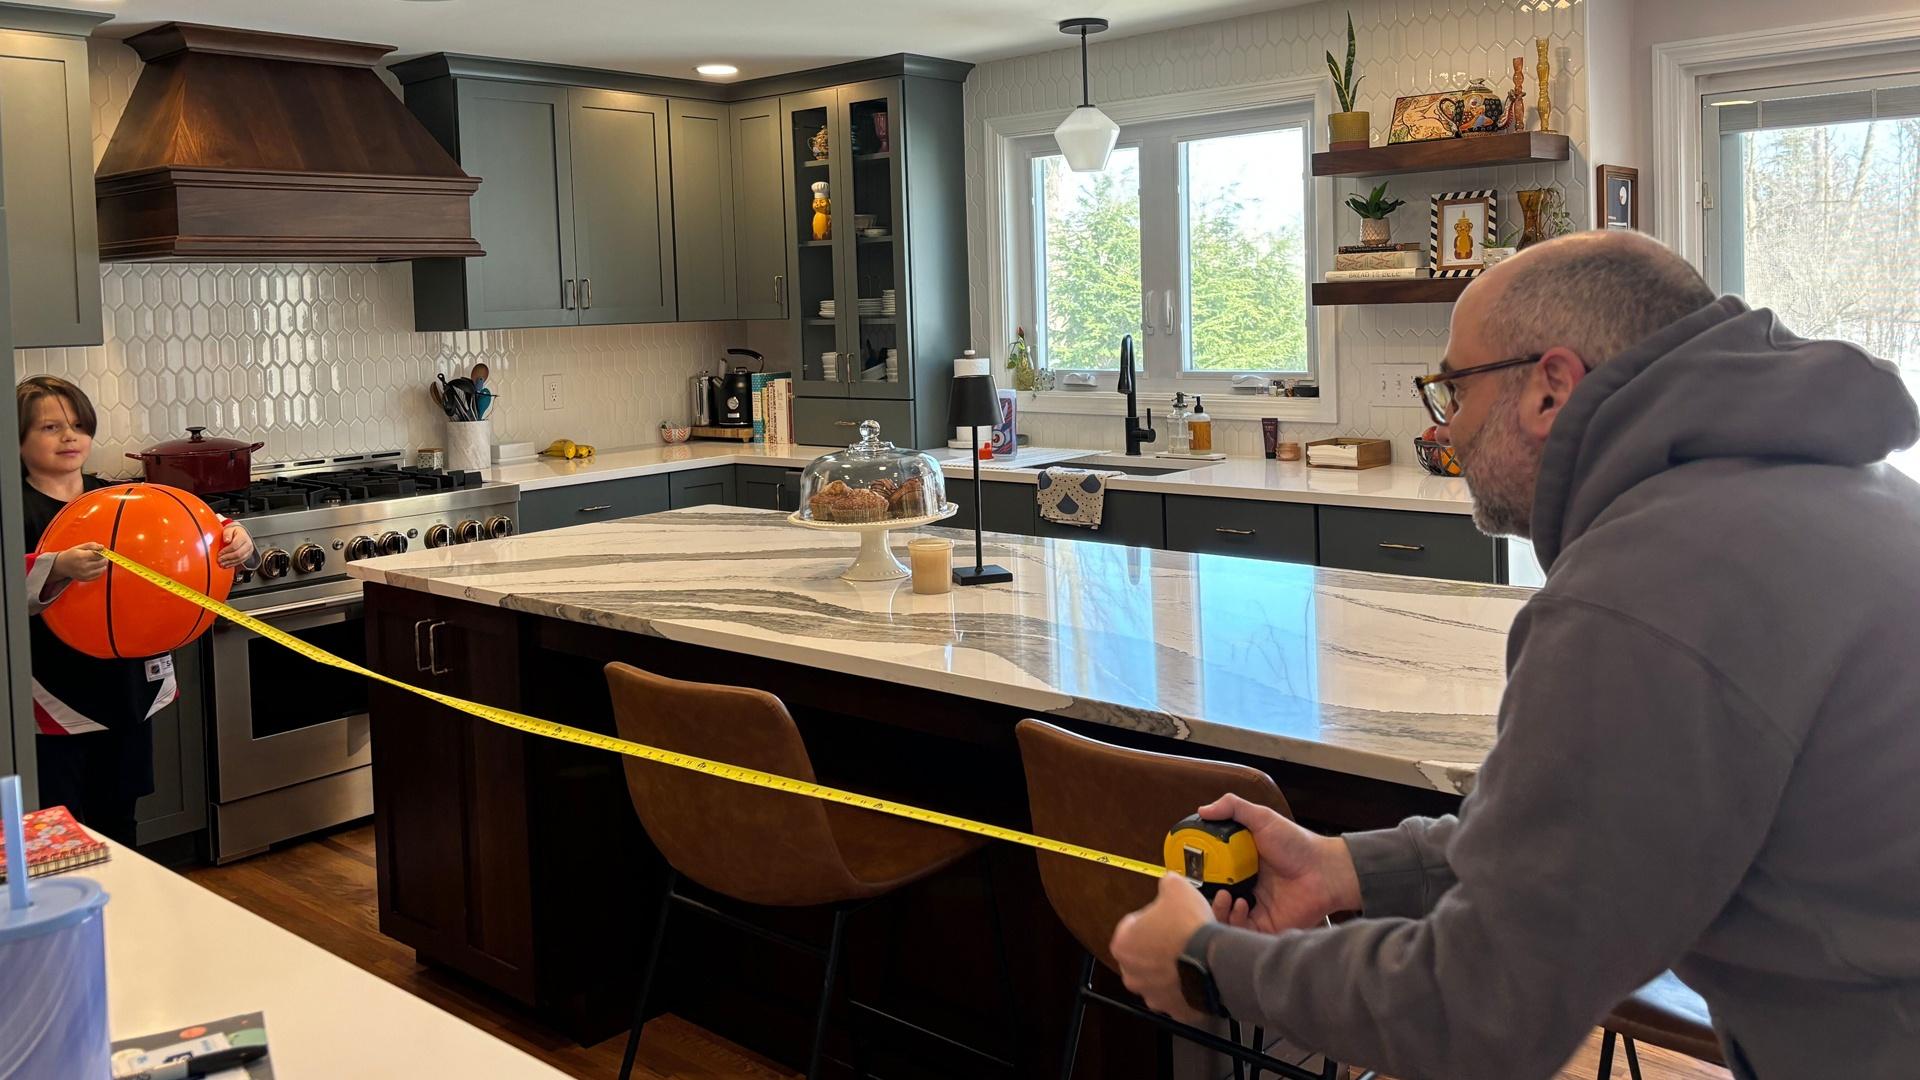
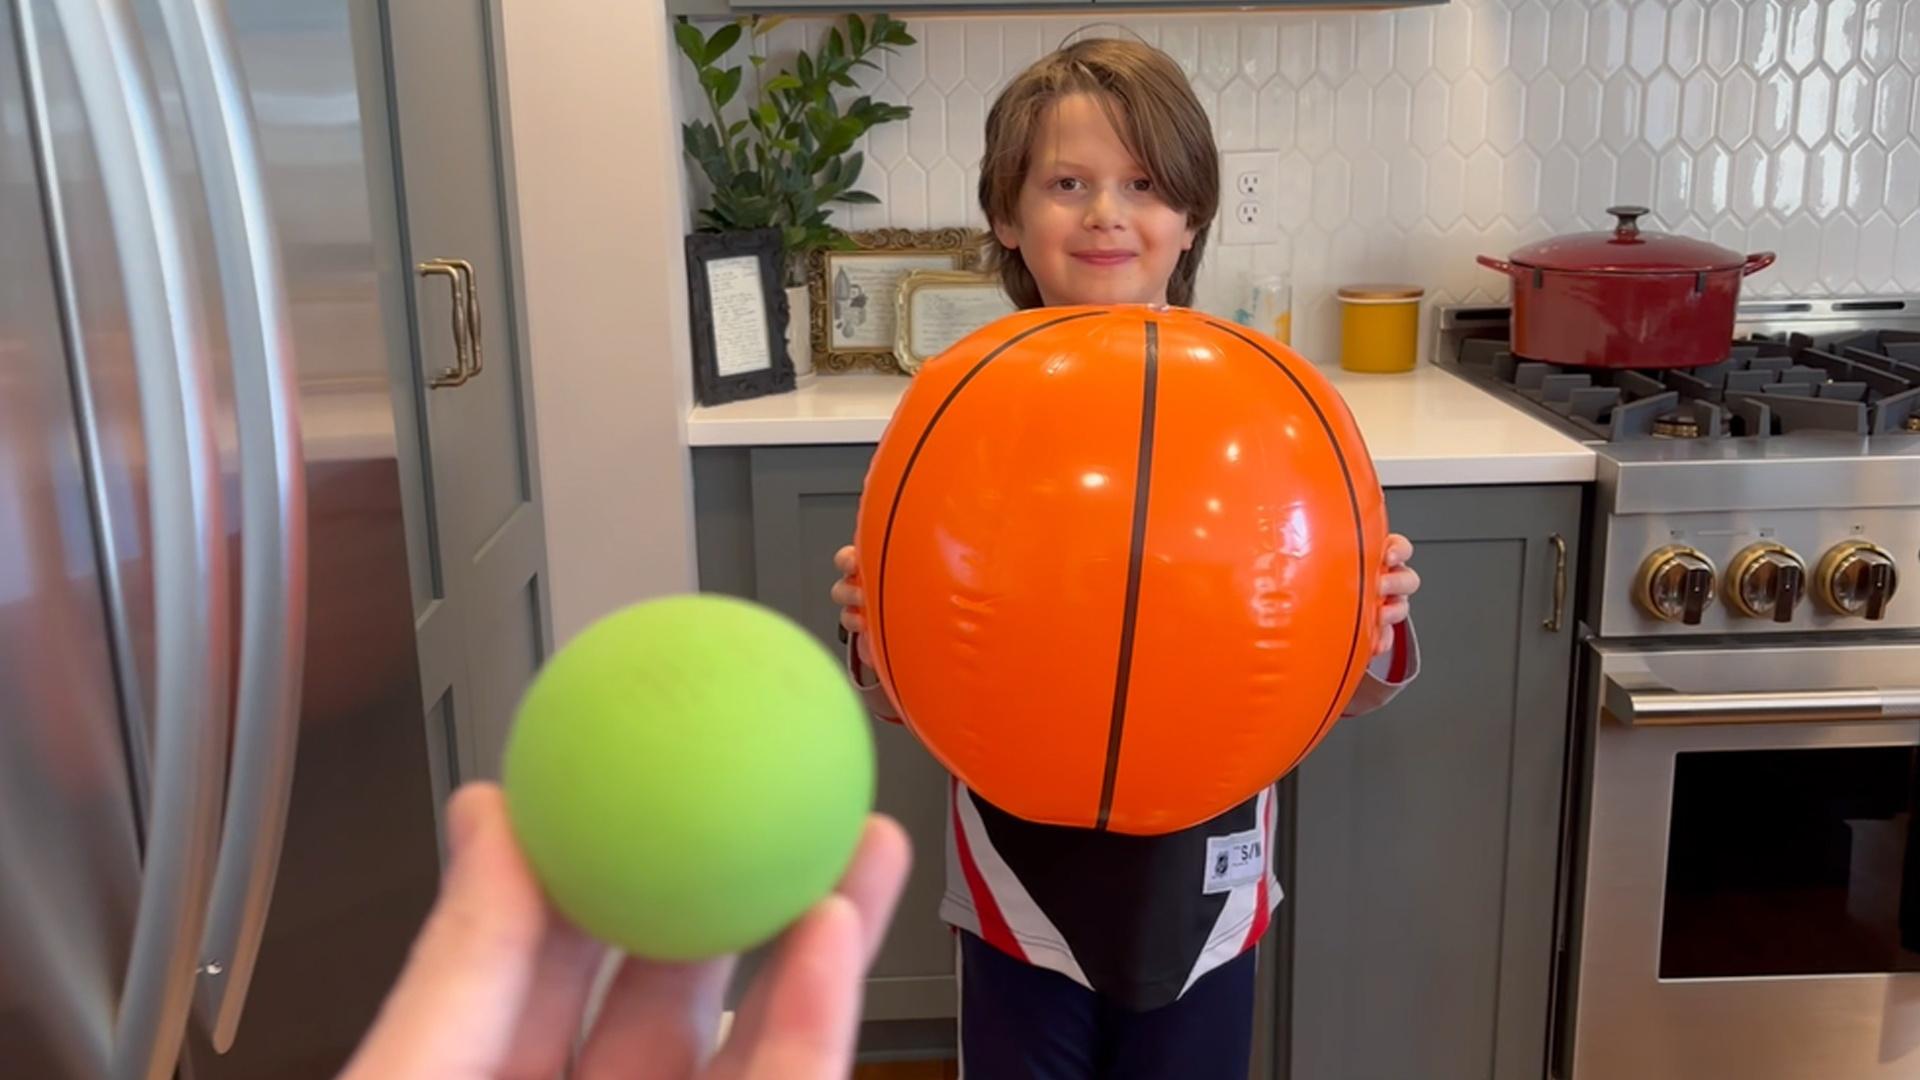
A tennis ball and a beach ball are different sizes. Can you make them appear to be the same size?
Materials
- 1 Beach Ball or basketball (measuring 12-20 inches in diameter)
- 1 tennis ball or golf ball
Directions
- Hand the beach ball/larger ball to your family member. What happens to the apparent size of the beach ball if they walk away?
- Now, hold up the tennis ball. Can you make the tennis ball and the beach ball appear to be the same size?
- Count the steps it takes to “eclipse” or line up the smaller ball with the larger one? Do you notice how far apart you are from each other? The farther away an object is, the smaller it appears.
How does it work?
Solar eclipses are possible because the Sun and the Moon have the same apparent size in the sky. The Sun is actually much bigger than the Moon, but they look the same size because the Sun is much farther away. The Sun’s diameter is about 400 times wider than that of the Moon, but the Sun is also about 400 times farther away from Earth. In astronomy, scientists often refer to objects by their apparent size as seen from Earth. The Sun and Moon just happen to have a very similar apparent size!
Solar eclipses are possible because of this amazing coincidence. During a solar eclipse, the Moon comes very close to covering the entire Sun. Earth is the only place in the whole solar system where a total solar eclipse can be observed.
New York State P-12 Science Learning Standards
The content in these videos and accompanying activities touch upon various concepts from the New York State Science Learning Standards - Grades 3-5 and Middle School (Grades 6-8).
Grade 5
- Space Systems: Stars and the Solar System
Middle School (Grades 6-8)
- Space Systems
Some Like It Hot | Watch
It’s the food most synonymous with Buffalo- chicken wings, in fact the rest of the world calls them Buffalo wings. You may think wings dipped in blue cheese is a match made in heaven but it’s really a match based in science. In this episode of Compact Science we’ll explore the science of wing sauce from the Scoville Scale to capsaicin zero in on how our bodies react when we taste something spicy.
Some Like It Hot | Biology
Topic: Senses, Adaptation, Information Processing
Viewer Challenge/At-Home Version:
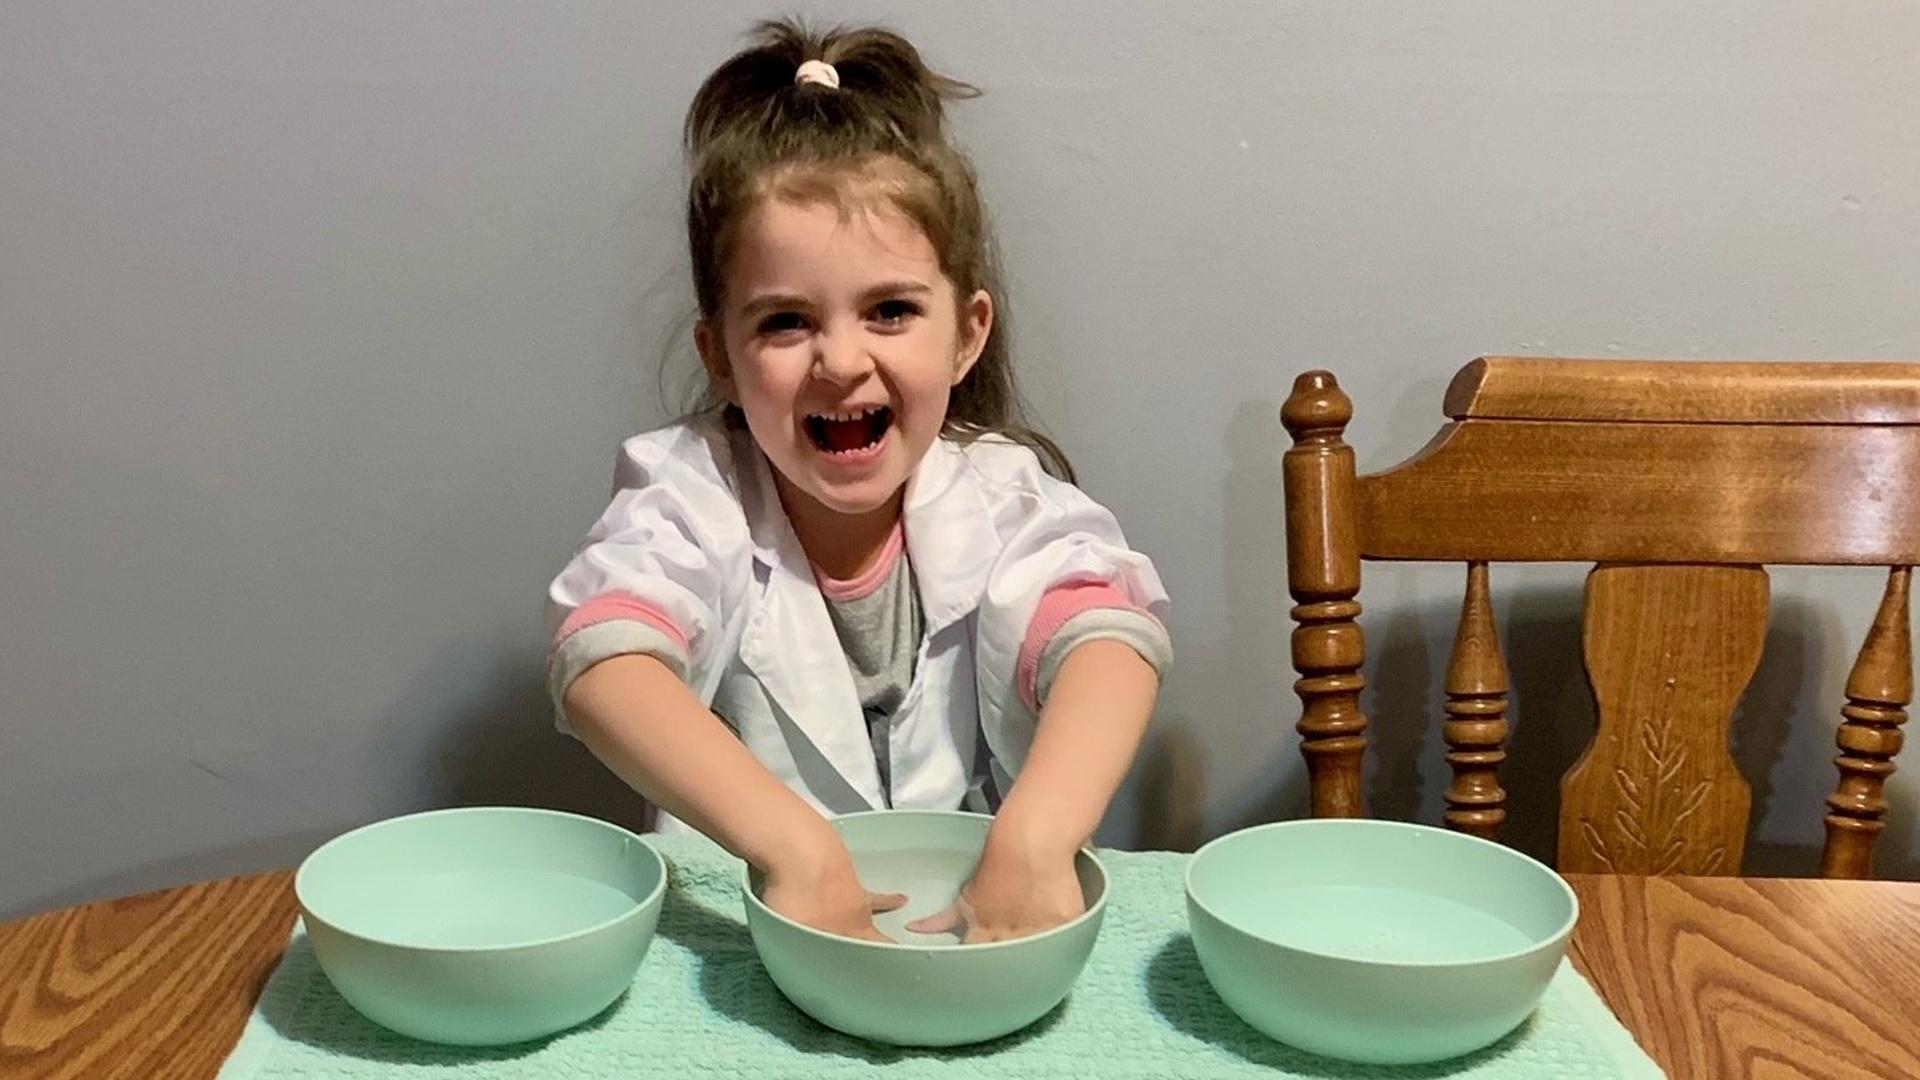
Fool Your Senses?
Use water to test your sensory perception of temperature.
Materials
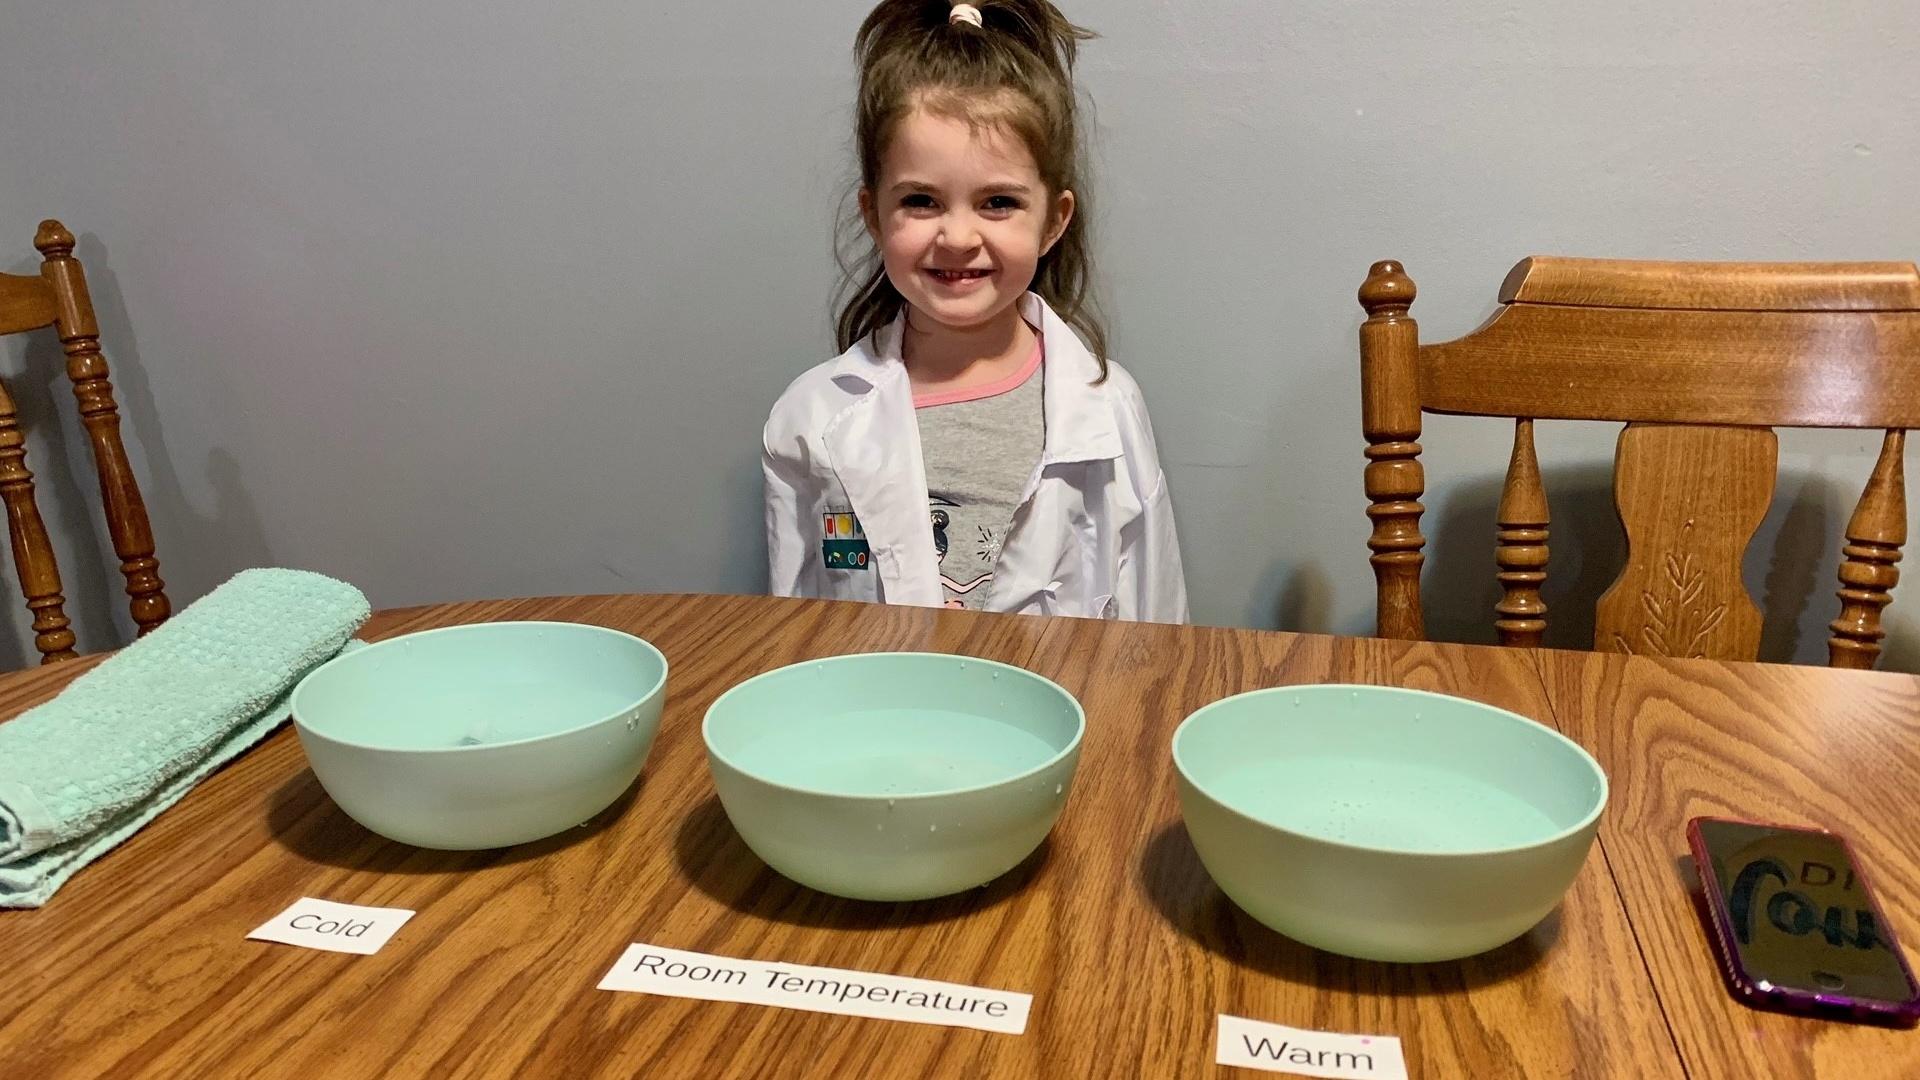
- Three bowls or containers large enough to put two hands in
- Warm water (NOTE - be careful not to make the water too hot!)
- Cold water, with a few ice cubes in it
- Room temperature water
- Towel to protect your work surface (optional)
- A clock to time yourself (optional)
Directions
- Prepare a work surface that can get a little wet by either laying down a towel, or removing any objects that should not get wet.
- Fill one bowl with warm water, one with iced water and one with room-temperature water.
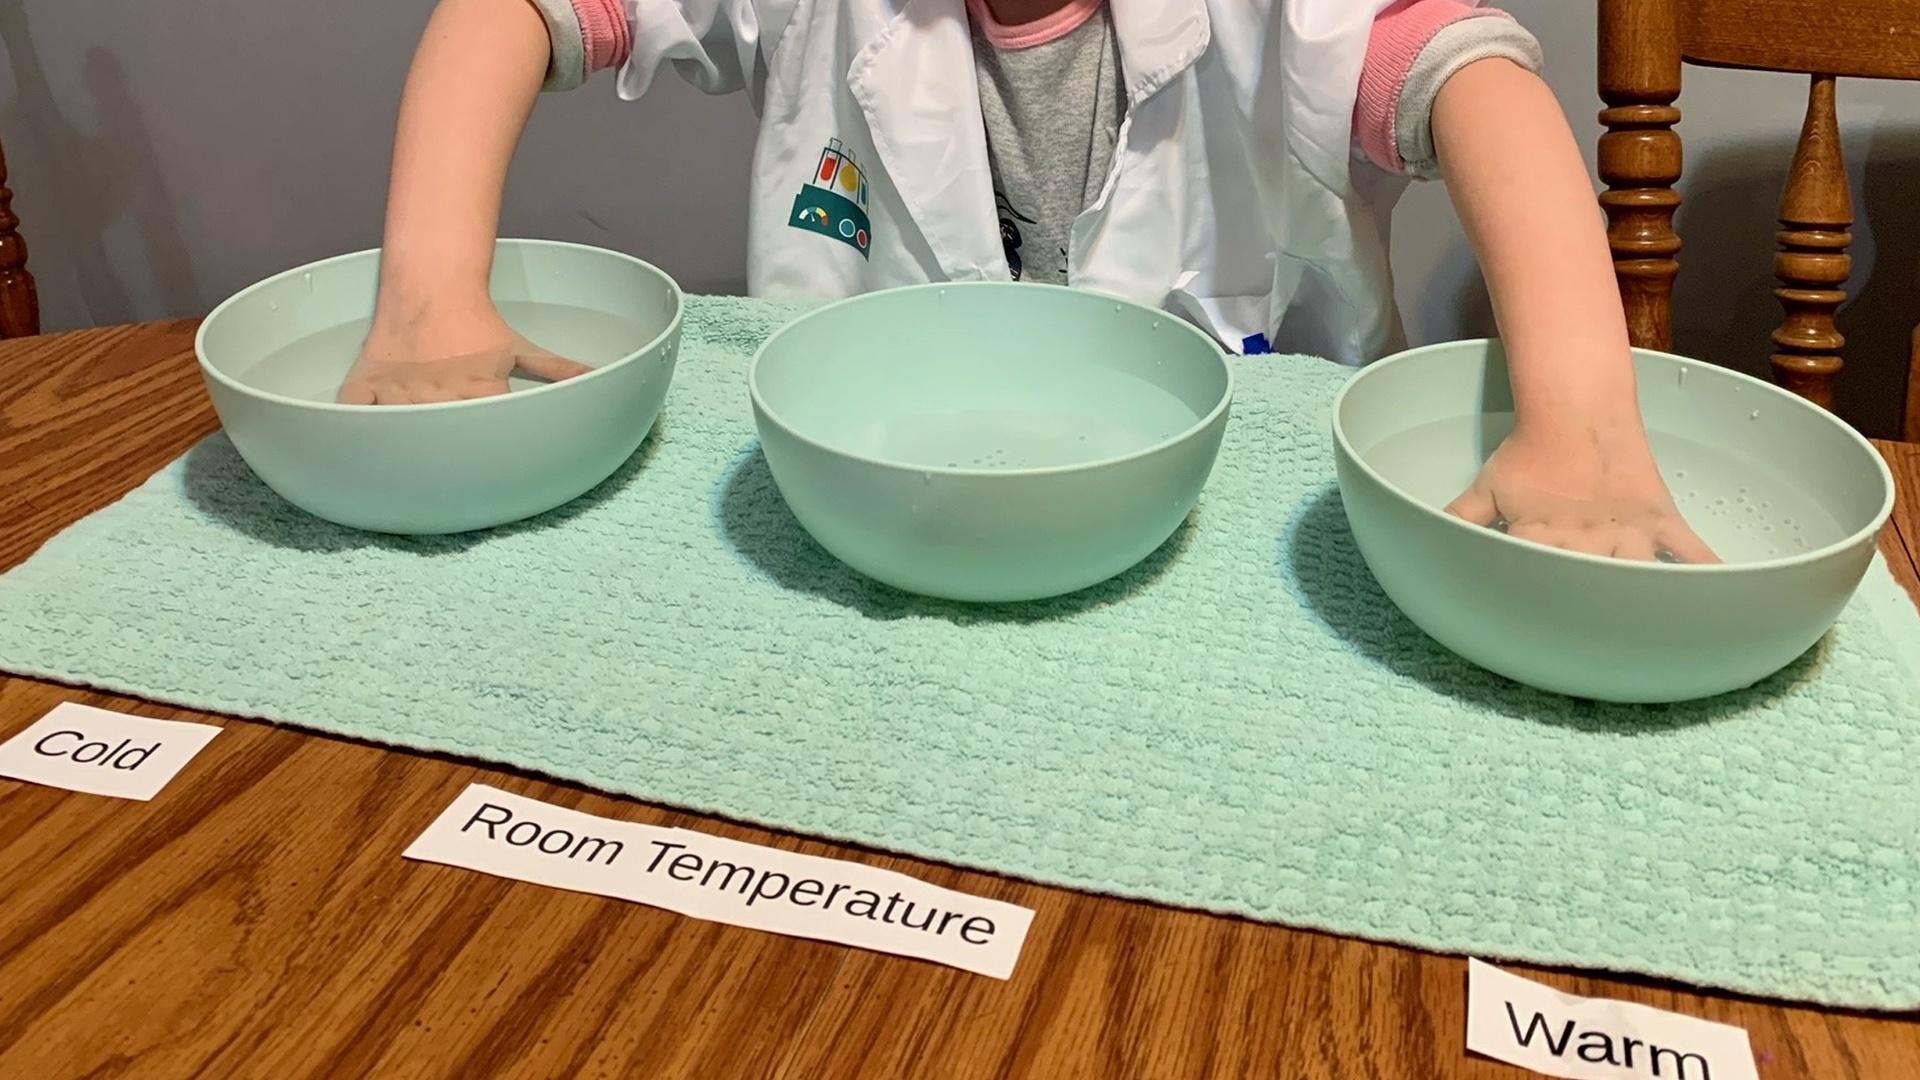
- Put one hand into the warm water and one in the iced water for one minute.
- Take your hands out of the water and put them both into the room-temperature water. How does the water feel? Does it feel hot, warm, room-temperature, cold or very cold? If it is hard to say, pay attention to what you would say if you felt only with your right hand and what would you say if you felt only with your left hand? Do your hands agree or disagree about the temperature of the water?
How does it work?
Sensory adaptation is the brain's way of protecting itself from overload.
When you submerge your hands in hot and cold water, the brain is getting the same message repeatedly. Thermoreceptors in one hand are sending the message, 'Cold, cold, cold,' while thermoreceptors in the other hand are sending the message, ‘Hot, hot, hot.’ And the brain is saying, 'I know, I know. Now leave me alone until you have something different to tell me.’
Your body adapted to heat on one side and cold on the other. The room temperature water is cooler than the hot water, and warmer than the cold water. So when you switch to the room temperature water, the receptors that got used to the hot water, send signals that sense it as cold; and the receptors that got used to the cold water sense the room temperature water as hot, even though they are both feeling water that is the same temperature.
Adaptation can also occur when we repeatedly smell something, like popcorn or when we look at something for a prolonged period. In all cases, the brain has adapted to the constant message it is receiving, and turns down its sensitivity to the particular smell or sight.
New York State P-12 Science Learning Standards
The content in these videos and accompanying activities touch upon various concepts from the New York State Science Learning Standards - Grades 3-5 and Middle School (Grades 6-8).
Grade 4
- Structure, Function, and Information Processing
Middle School (Grades 6-8)
- Structure, Function, and Information Processing
There's No Business Like Snow Business | Watch
We explore the science of lake effect snow and see why Buffalo, NY is so often in its bullseye. Some may think it’s destiny that makes Buffalo one of the snowiest cities in the US, but it is really density.
There's No Business Like Snow Business | Meteorology
Topic: Lake Effect Snow, Density
Viewer Challenge/At-Home Version:
Will It Float?
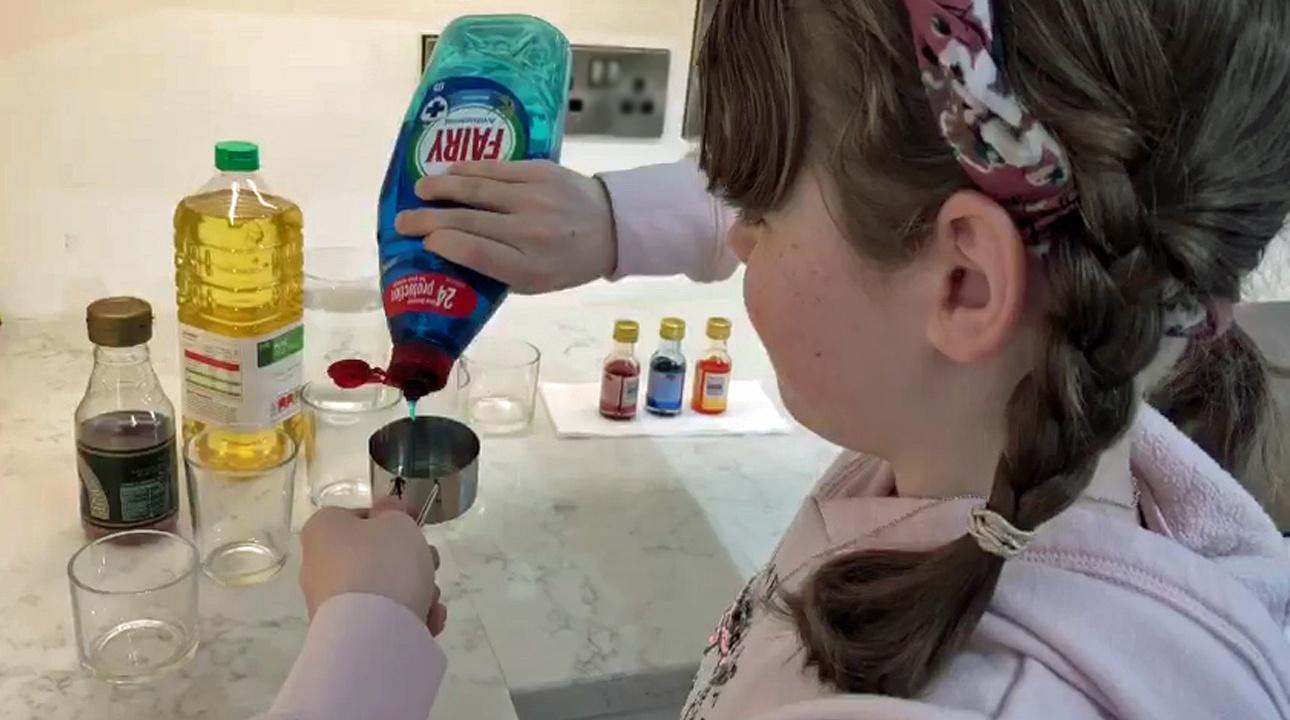
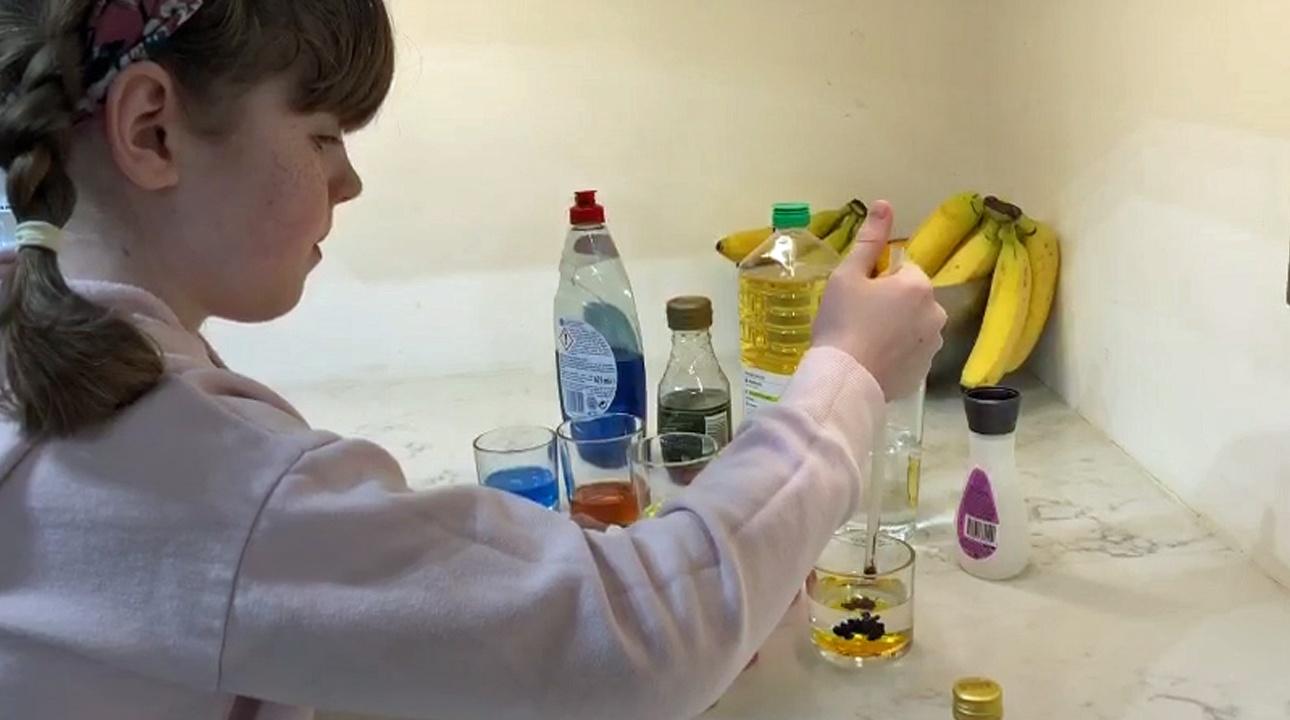
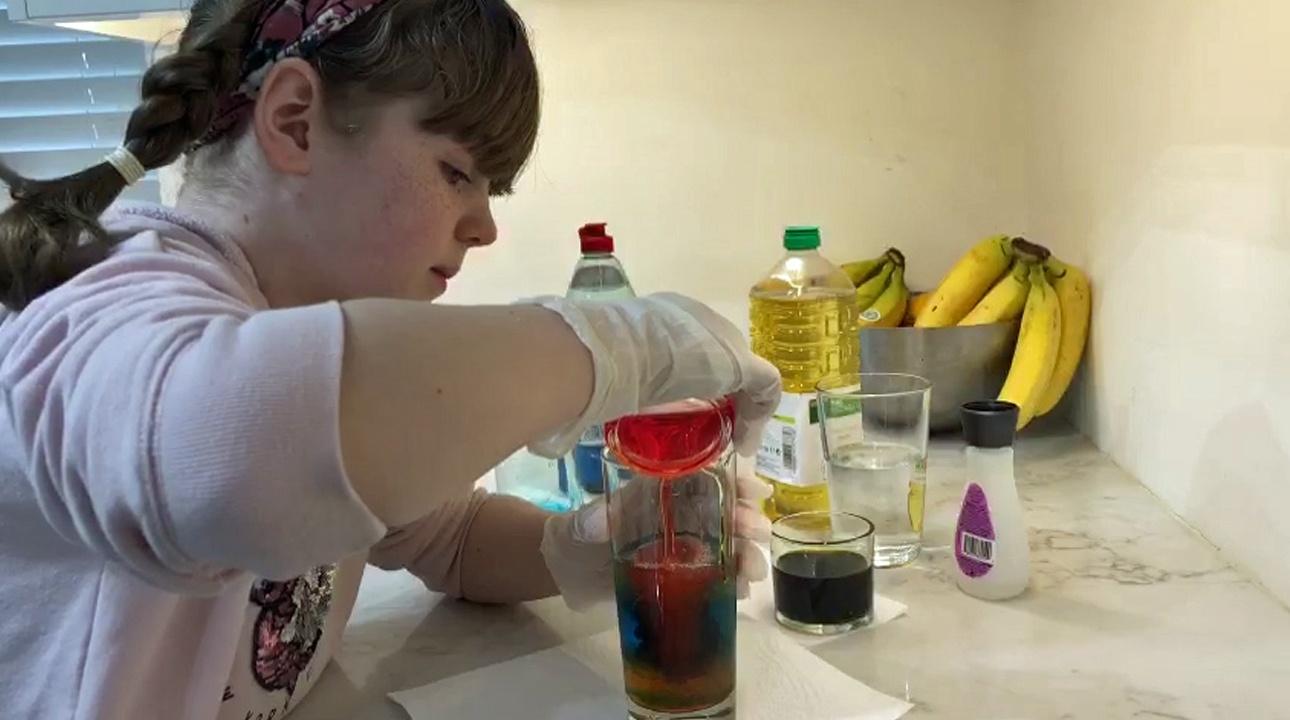
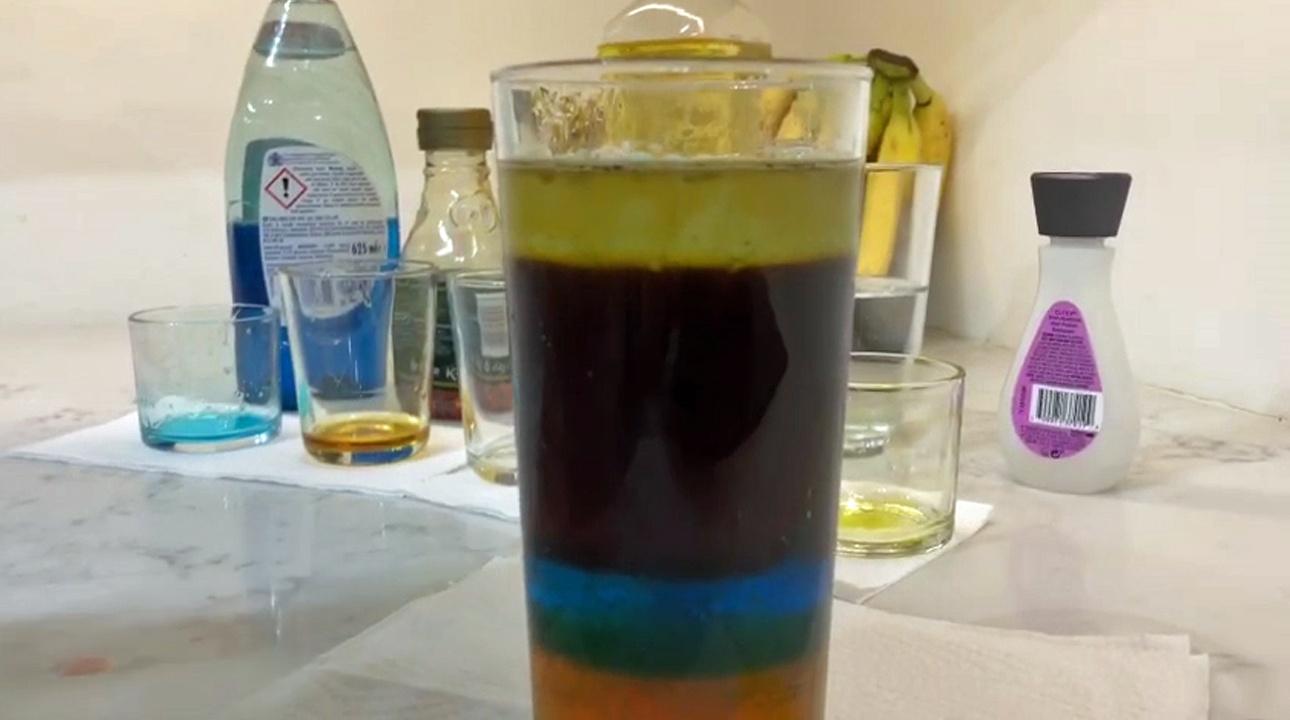
Try your hand at stacking liquids. Pour together different substances to create a colorful density column!
Materials
- Water
- Vegetable Oil
- Light Corn Syrup
- Dish Soap
- Rubbing alcohol
- Liquid food coloring
- 1 medium-sized clear glass (16 oz or more)
- ¼ cup measuring spoon
- 5 smaller cups (one per liquid)
Directions
- Pour ¼ cup of each liquid into the 5 smaller cups, one liquid per cup
- Add food coloring to the colorless liquids so that you have five different colors (note: the food coloring will not mix with the oil)
- One at a time, add the liquids in the following order: soap, corn syrup, oil, water, rubbing alcohol
How does it work?
Density is the amount of stuffed that is packed together (density = mass/volume). Things with high density sink, while things that have a low density float! Warm air is less dense, so it floats – hot air rises. Cold air is denser, so it sinks.
Different liquids can have different densities too. The denser materials at the bottom of your glass are packed with more “stuff” – more atoms and molecules.
New York State P-12 Science Learning Standards
The content in these videos and accompanying activities touch upon various concepts from the New York State Science Learning Standards - Grades 3-5 and Middle School (Grades 6-8).
Grade 3
- Weather and Climate
Middle School (Grades 6-8)
- Weather and Climate
Science Friction | Watch
Curling is a thrilling sport filled with strategy, skill, sweeping, surprise and science!
Are you curious about how friction affects motion? Check out our Compact Science Viewer Challenge for the Science Friction episode.
Science Friction | Physics
Topic: Curling & Friction, Inertia and Momentum
Viewer Challenge/At-Home Version:
Make a Mini Hovercraft
Get first-hand experience on how friction affects motion!
Materials
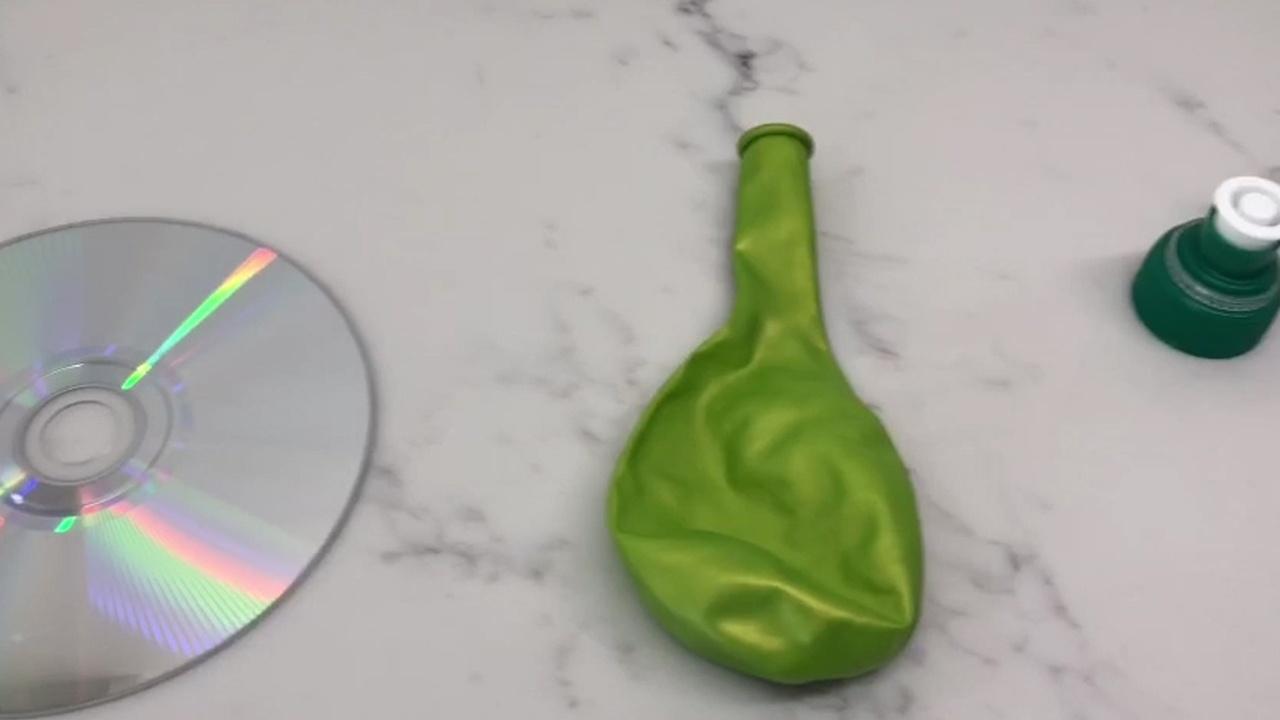
- A CD or DVD disc (use one what you’re not using anymore!)
- A pop-top cap from a dish soap or water bottle
- Duct tape
- Balloon
Directions
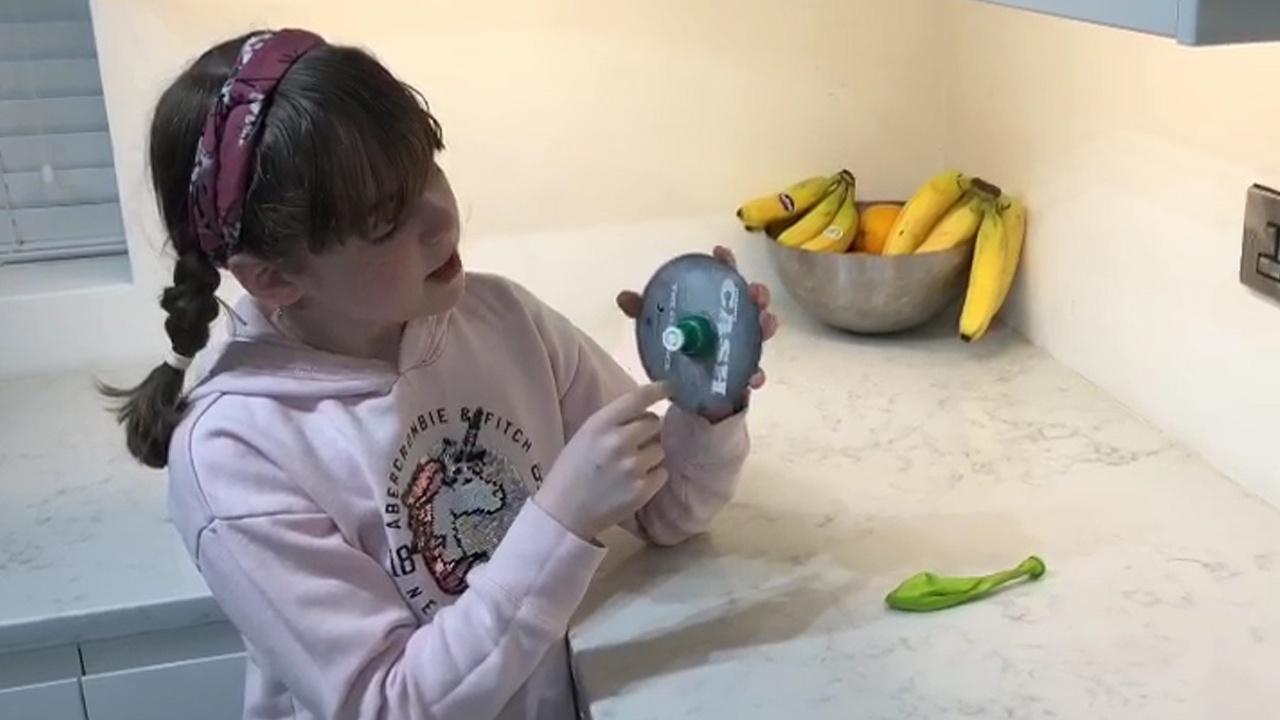
- Position the pop-top cap over the center hole of the CD
- Secure it in place with duct tape and make sure it is air-tight
- Push the cap down to close it
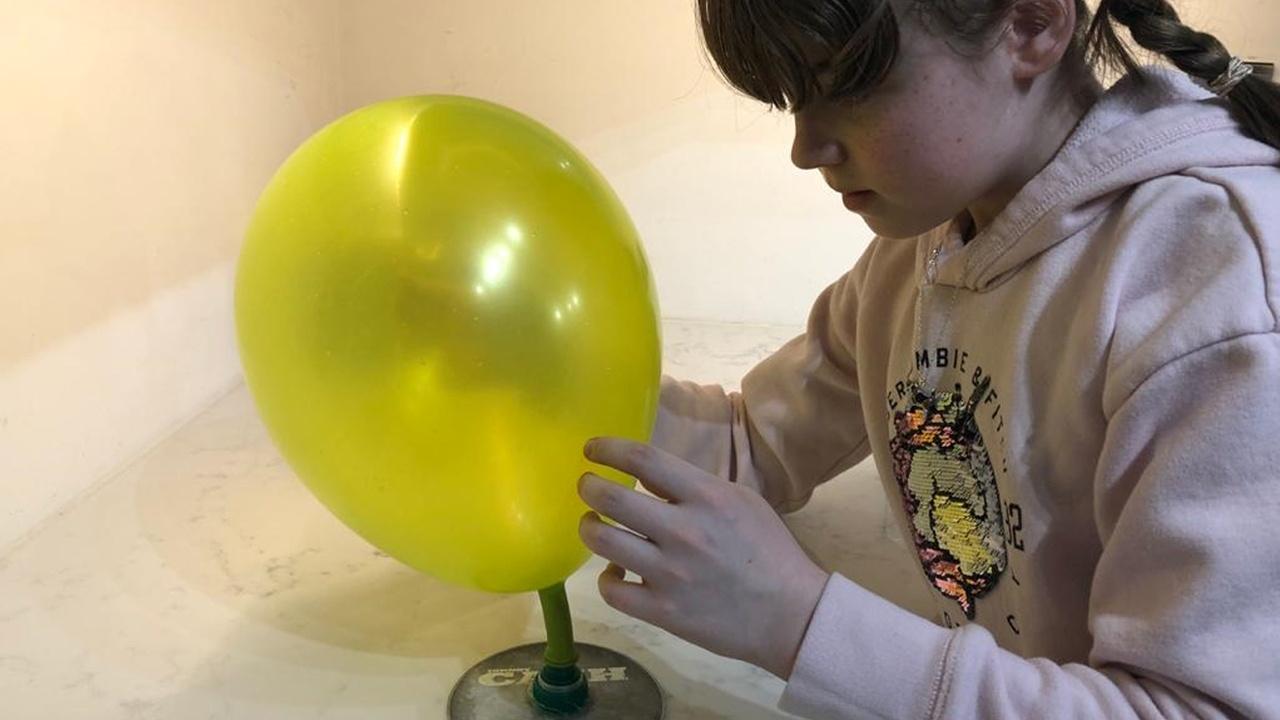
- Blow up the balloon and twist the end so the air can’t escape
- Stretch the mouth of the balloon over the pop-top cap
- Place the hovercraft on a flat surface (floors and tables work great!)
- Pull open the pop-top cap to release the air
- Repeat steps 3-7 to try it again!
- For a challenge, test your hovercraft on different surfaces!
How does it work?
Friction occurs when two objects are touching. The air coming out of the balloon creates an area of low friction by creating a layer between the surface and the CD, which allows the hovercraft to glide. When the balloon fully deflates and the air isn’t flowing, the CD will be directly touching the table and will not move as easily.
New York State P-12 Science Learning Standards
The content in these videos and accompanying activities touch upon various concepts from the New York State Science Learning Standards - Grades 3-5 and Middle School (Grades 6-8).
Grade 3
- Forces and Interactions
Grade 4
- Energy
Middle School (Grades 6-8)
- Forces and Interactions
- Energy
Sponge Candy Chemistry | Watch
Sponge candy, a delicate, yet crunchy toffee confection covered in chocolate, is perhaps the sweetest way to explore chemistry.

Are you curious about chemical reactions? Check out our Compact Science Viewer Challenge for the Sponge Candy Chemistry episode.
Sponge Candy Chemistry | Chemistry
Topic: Sponge Candy, Chemistry of Baking Soda
Viewer Challenge/At-Home Version:Fizzy Fun!
Materials
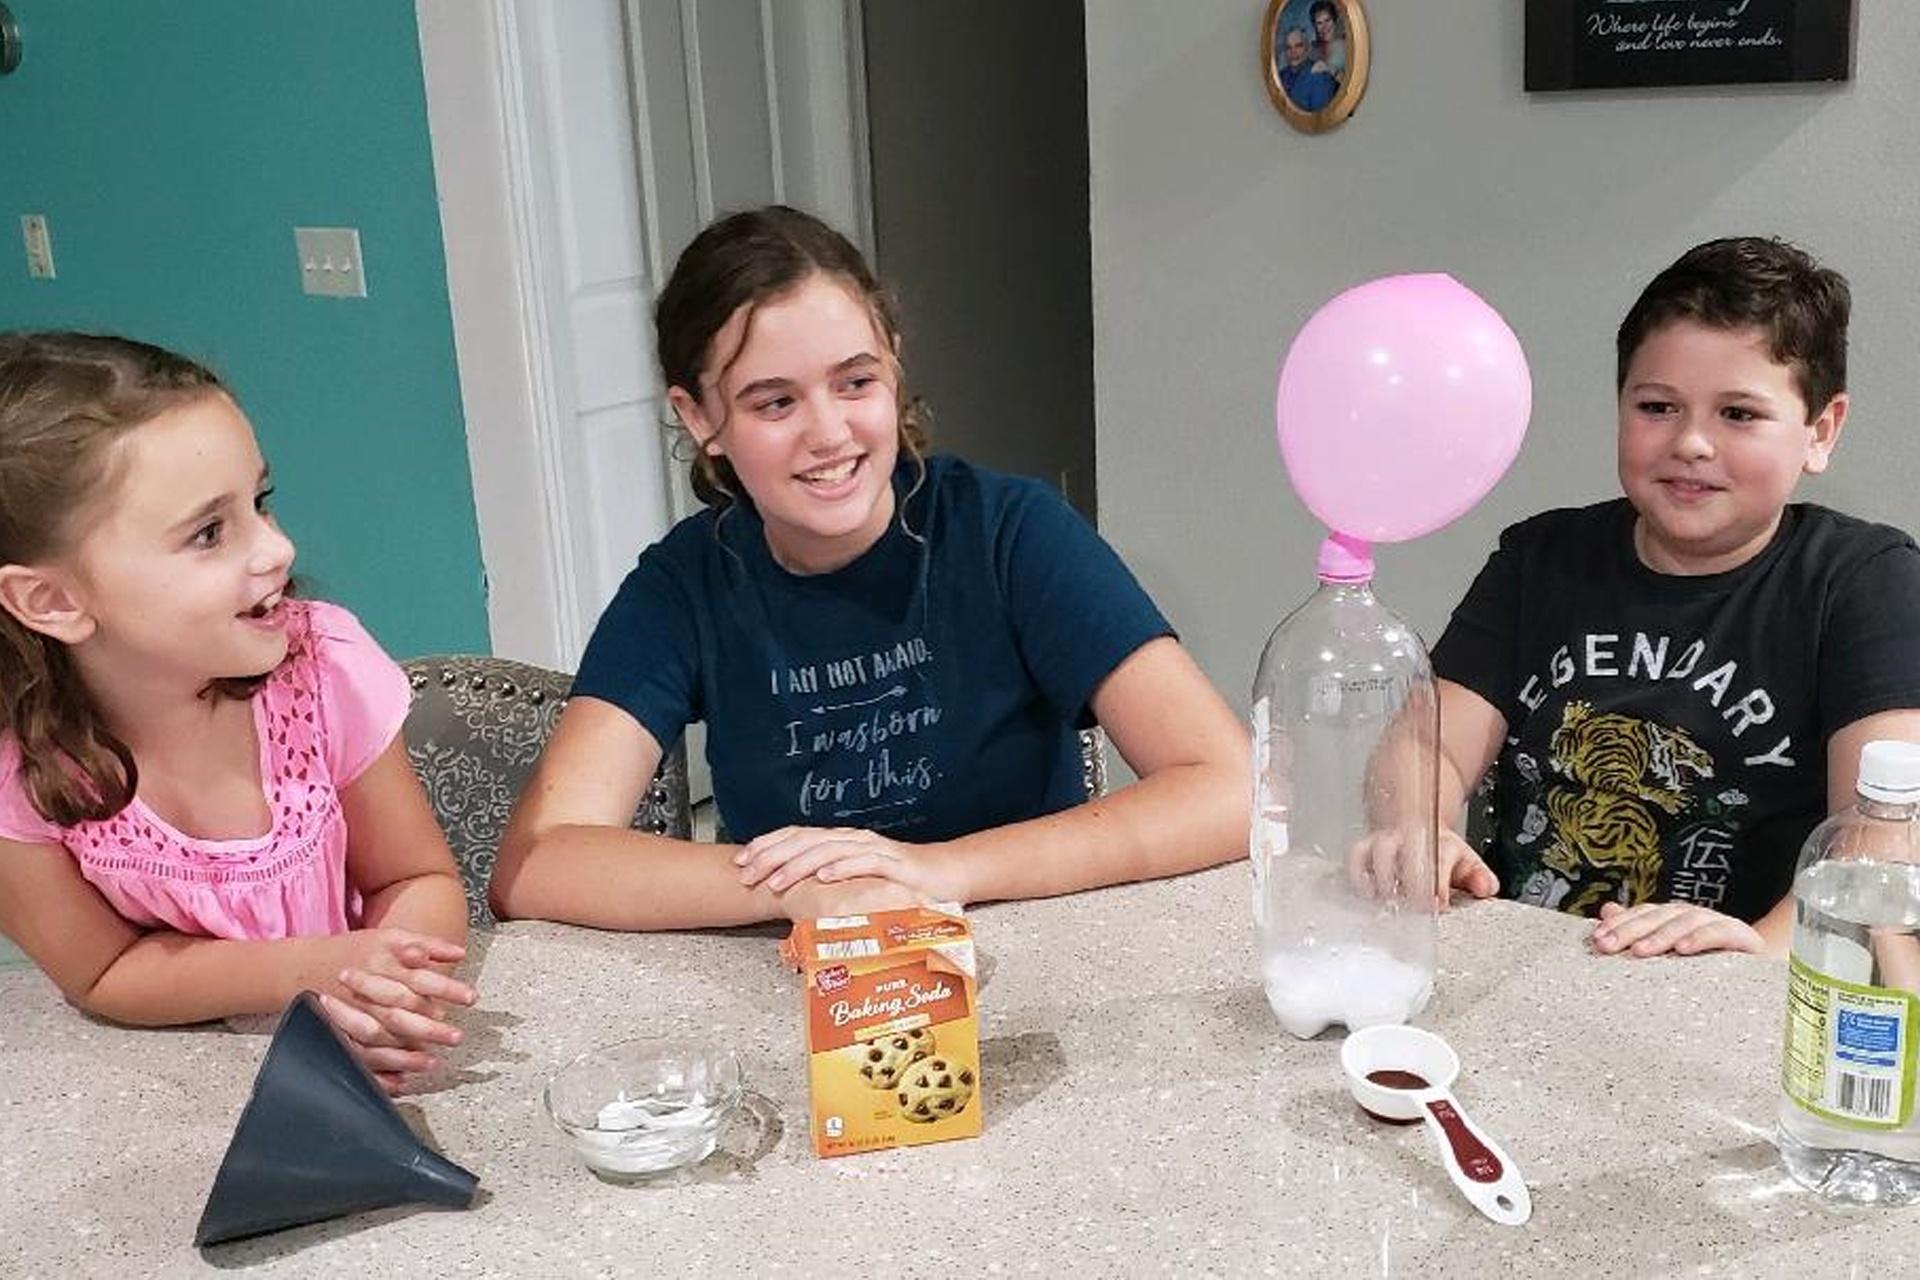
- Balloon
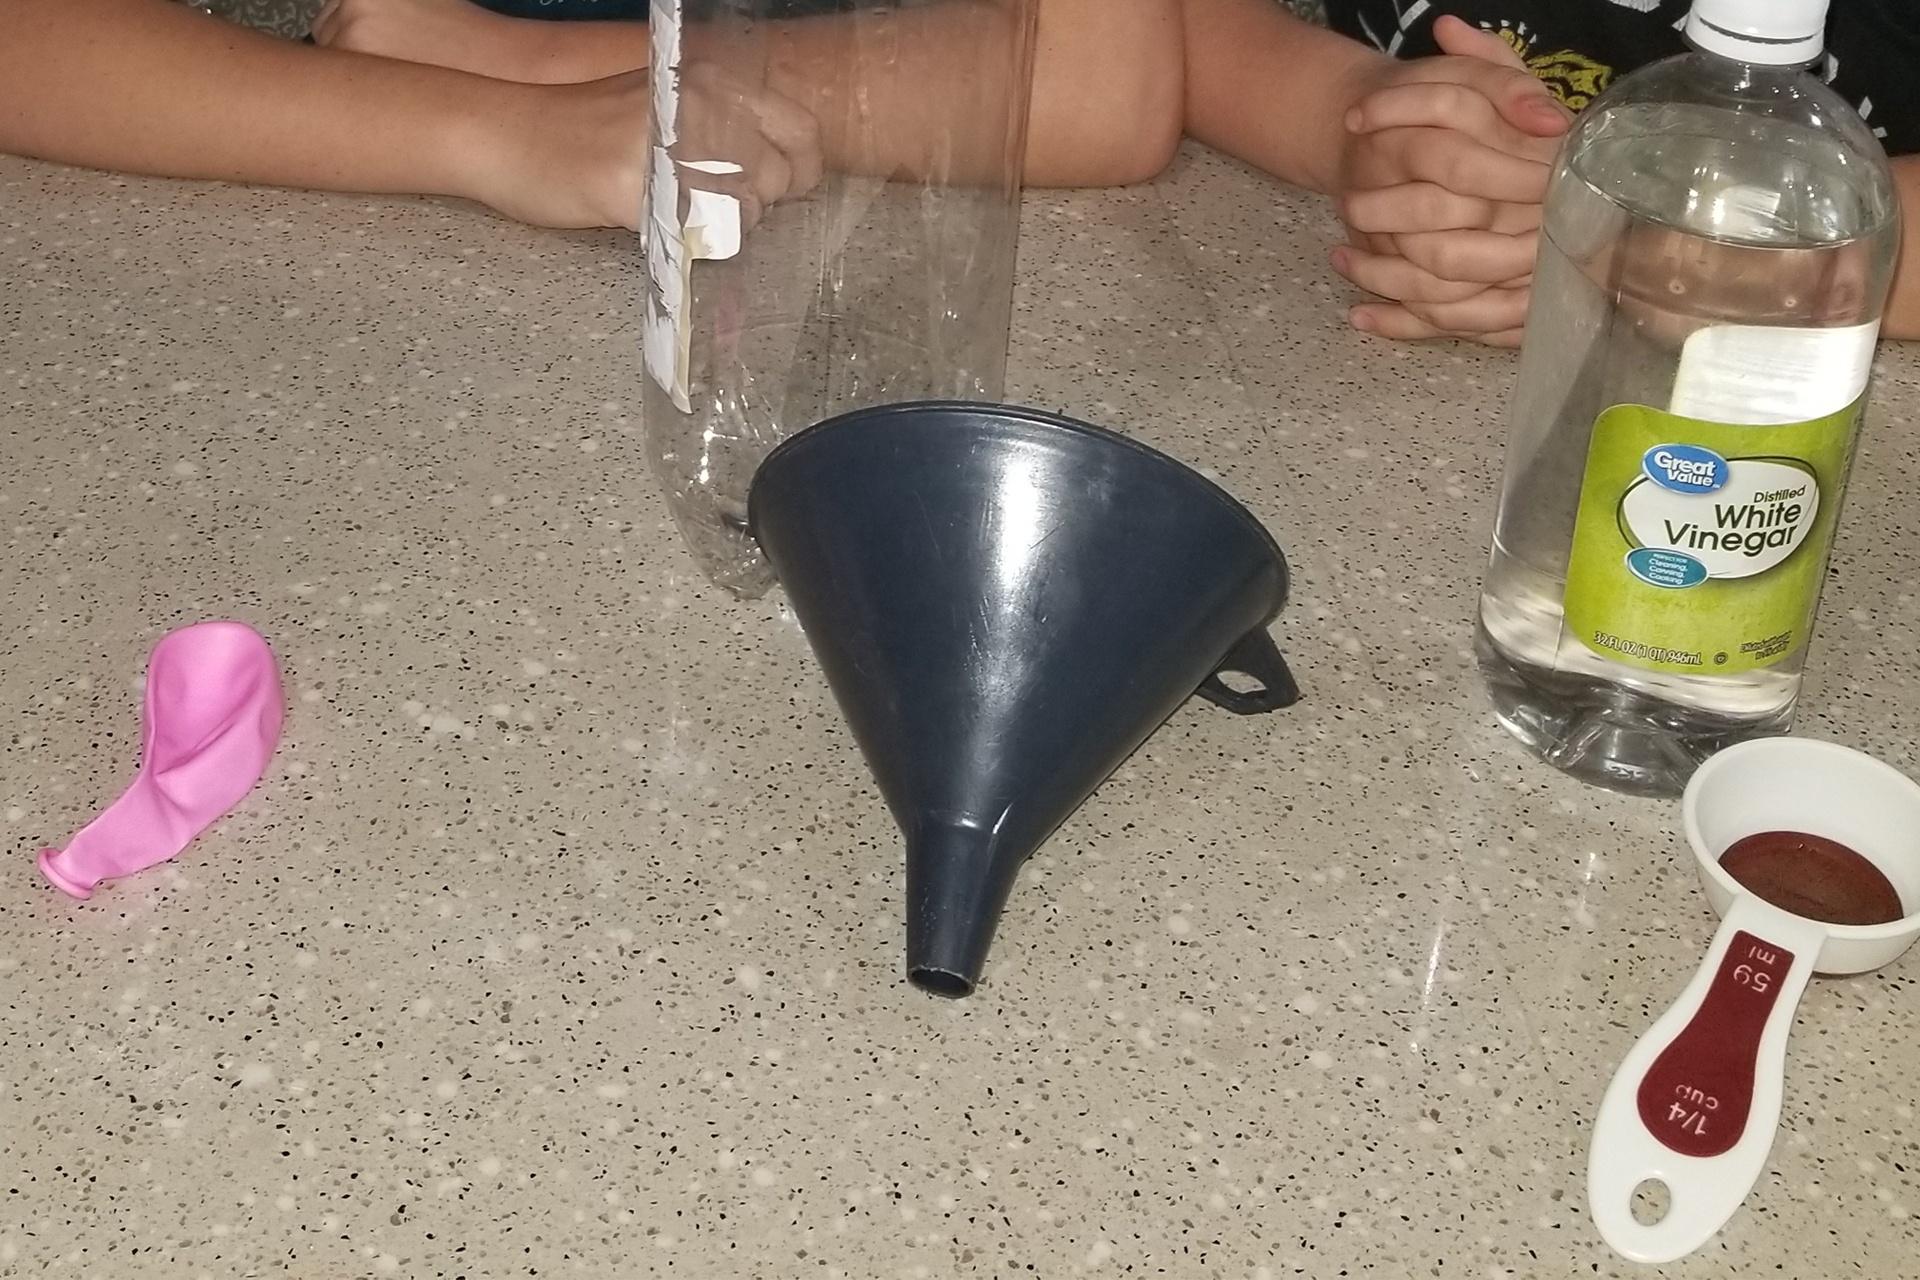
- Funnel
- ¼ cup vinegar
- 2 teaspoons baking soda
- Empty plastic bottle (1L to 2L)
Directions
- Use the funnel to pour the baking soda into an empty balloon. Rinse and dry the funnel.
- Use the funnel to pour vinegar into the bottle
- Stretch of the mouth of the balloon around the bottle top
- Lift the balloon and gently shake the baking soda into the bottle.
- Watch what happens!
How does it work?
Instead of adding heat to change the baking soda, we added another chemical! When you combine the baking soda with the vinegar, an acid-base chemical reaction takes place, creating carbon dioxide gas! This carbon dioxide is what made the balloon inflate, and it’s what makes forms the bubbles in sponge candy.
New York State P-12 Science Learning Standards
The content in these videos and accompanying activities touch upon various concepts from the New York State Science Learning Standards - Grades 3-5 and Middle School (Grades 6-8).
Grade 5
- Structure and Properties of Matter
Middle School (Grades 6-8)
- Structure and Properties of Matter
- Chemical Reactions
The Fury of the Falls | Watch
Niagara Falls is one of the most recognizable waterfalls in the world and it also happens to be in our backyard. In this episode we explore the power of water and its erosive power that shaped this geological wonder.

Are you curious about erosion? Check out our Compact Science Viewer Challenge for the Fury of the Falls episode.
The Fury of the Falls | Geology
Topic: Water & Erosion, the Formation of Niagara Falls
Viewer Challenge/At-Home Version: Candy Erosion
Use water in different ways to see how fast your candy disappears.
Materials
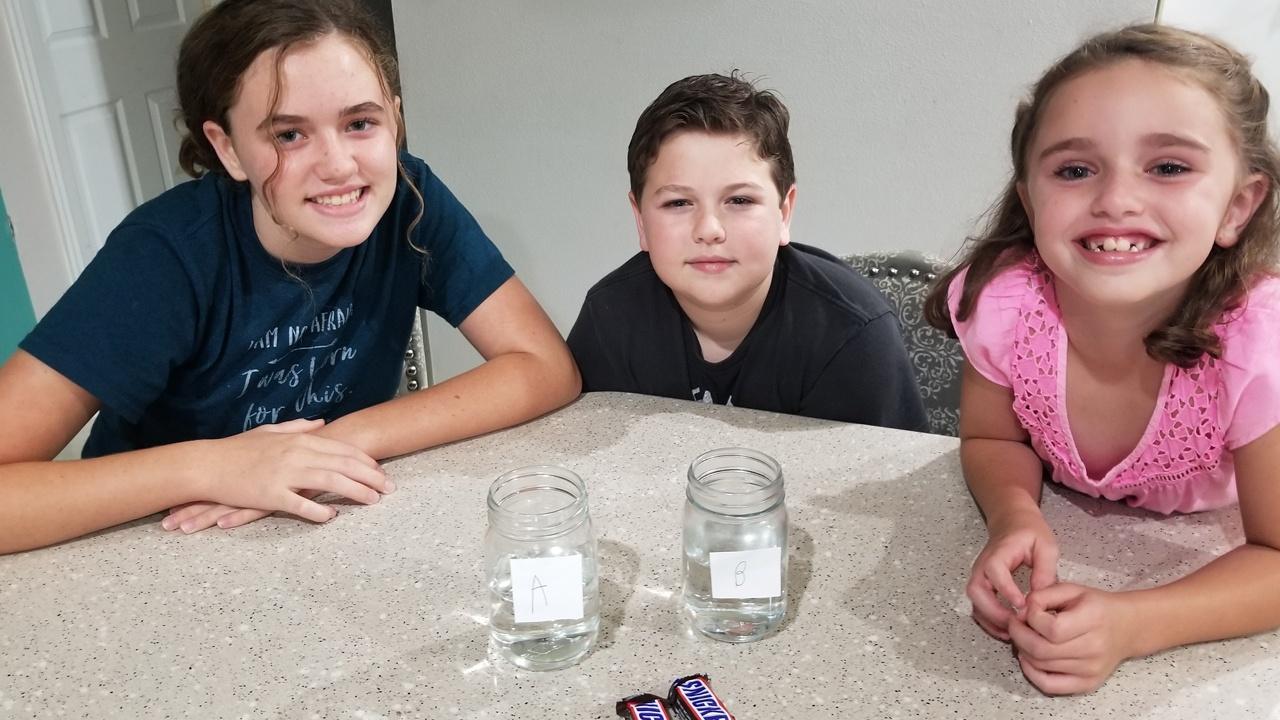
- Two pieces of [fun sized] candy, can be hard candy, chewy candy, or chocolate
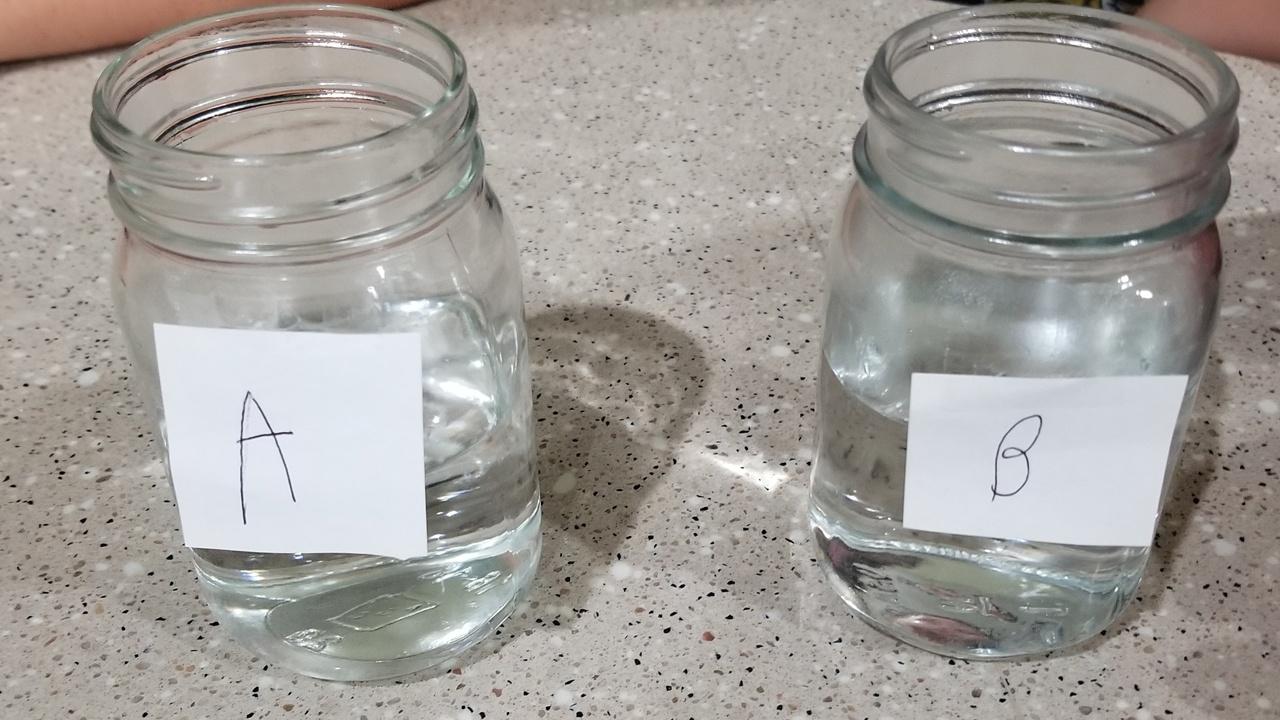
- Two see-through jars with lids
- Water
- Clock
Directions
- Fill each jar half full of water so that candy will be completely submerged
- Put one candy in each jar, close the lids tightly, and label jars A and B
- Let jar A stand, untouched for the duration of the experiment
- Shake jar B for 20 seconds once every hour
- What do you notice about the candies in the water after 1 day? 2 days? 3 days? And what does that tell us about the force of water?
How does it work?
Water can erode on its own through the process of dissolution, like in jar A. With added force, or shaking, like in jar B, we can speed up the rate of erosion. This is one of the reasons why areas that have fast water movement, like Niagara Falls, experience a faster rate of erosion than other places where water is standing still, like in a pond.
New York State P-12 Science Learning Standards
The content in these videos and accompanying activities touch upon various concepts from the New York State Science Learning Standards - Grades 3-5 and Middle School (Grades 6-8).
Grade 4
- Earth’s Systems: Processes that Shape the Earth
Grade 5
- Earth’s Systems
Middle School (Grades 6-8)
- History of Earth
- Earth's System

